 Bubble Mew
UMAD — Phase 1#
See the fundamentals for role abbreviations (MT/ST/H1/H2/D1/D2/D3/D4).
Mechanic Timeline#
| Time | Mechanic | Notes |
|---|---|---|
| 0:00 | Graven Image 1 | Knockback lineup, Fire/Ice rings, lasers, towers, Confetti KB |
| — | Graven Image 2 | Gravity puddles, Rocks, tankbusters, Confetti KB through puddles |
Graven Image 1#
Step 1 — Knockback to lineup + Fire/Ice rings#
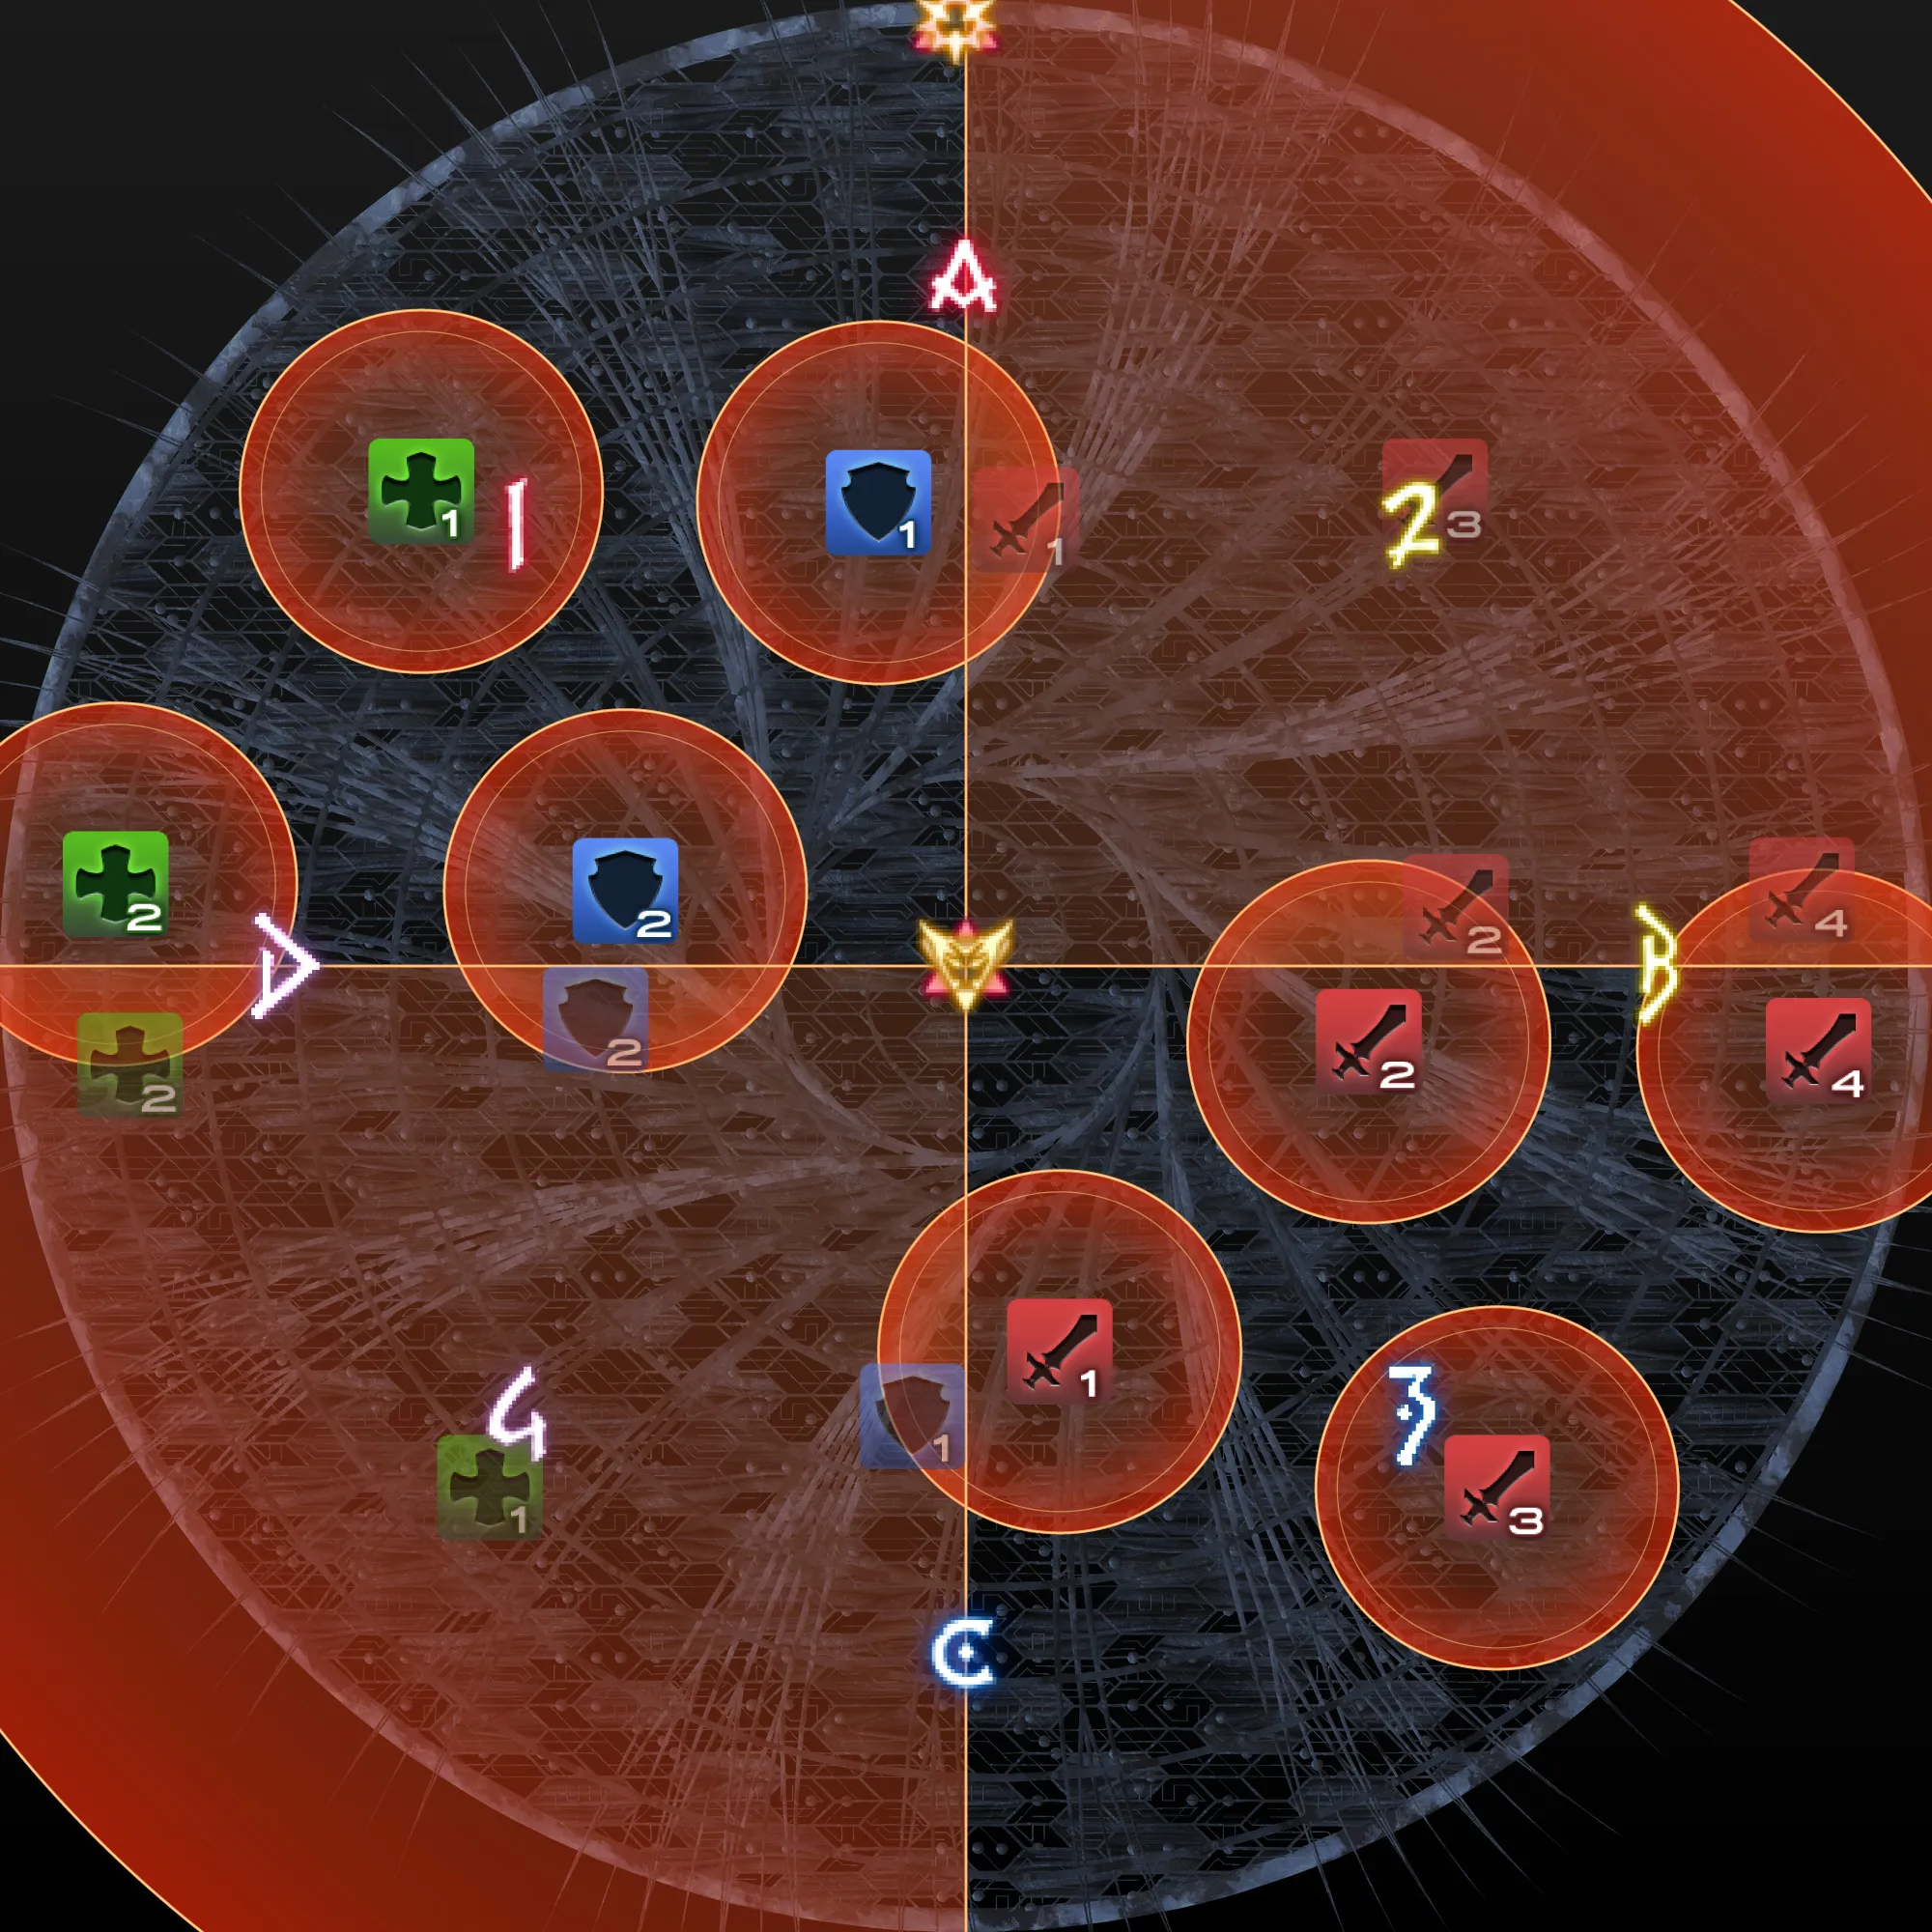
A statue tethers to all Supports or all DPS and knockbacks everyone toward their lineup spot. While landing, Kefka simultaneously telegraphs two rings of orbs:
| Ring | Element | Default Mechanic |
|---|---|---|
| Top ring | Fire | Stack or Spread (telegraphed) |
| Bottom ring | Ice/Lightning | 90° Cones |
? Orb rule: If an orb on the ring shows a ?, it does the opposite mechanic.
- ? Fire orb → reverses Stack/Spread
- ? Ice orb → stand inside the AOE instead of dodging the cone
Lineup — use the knockback to land here:
| ← West (Supports) | East (DPS) → |
|---|---|
| H1 · H2 · MT · ST | D1 · D2 · D3 · D4 |
Resolve the Fire/Ice ring while landing from the knockback.
Step 2 — Spread + Lasers + Towers#
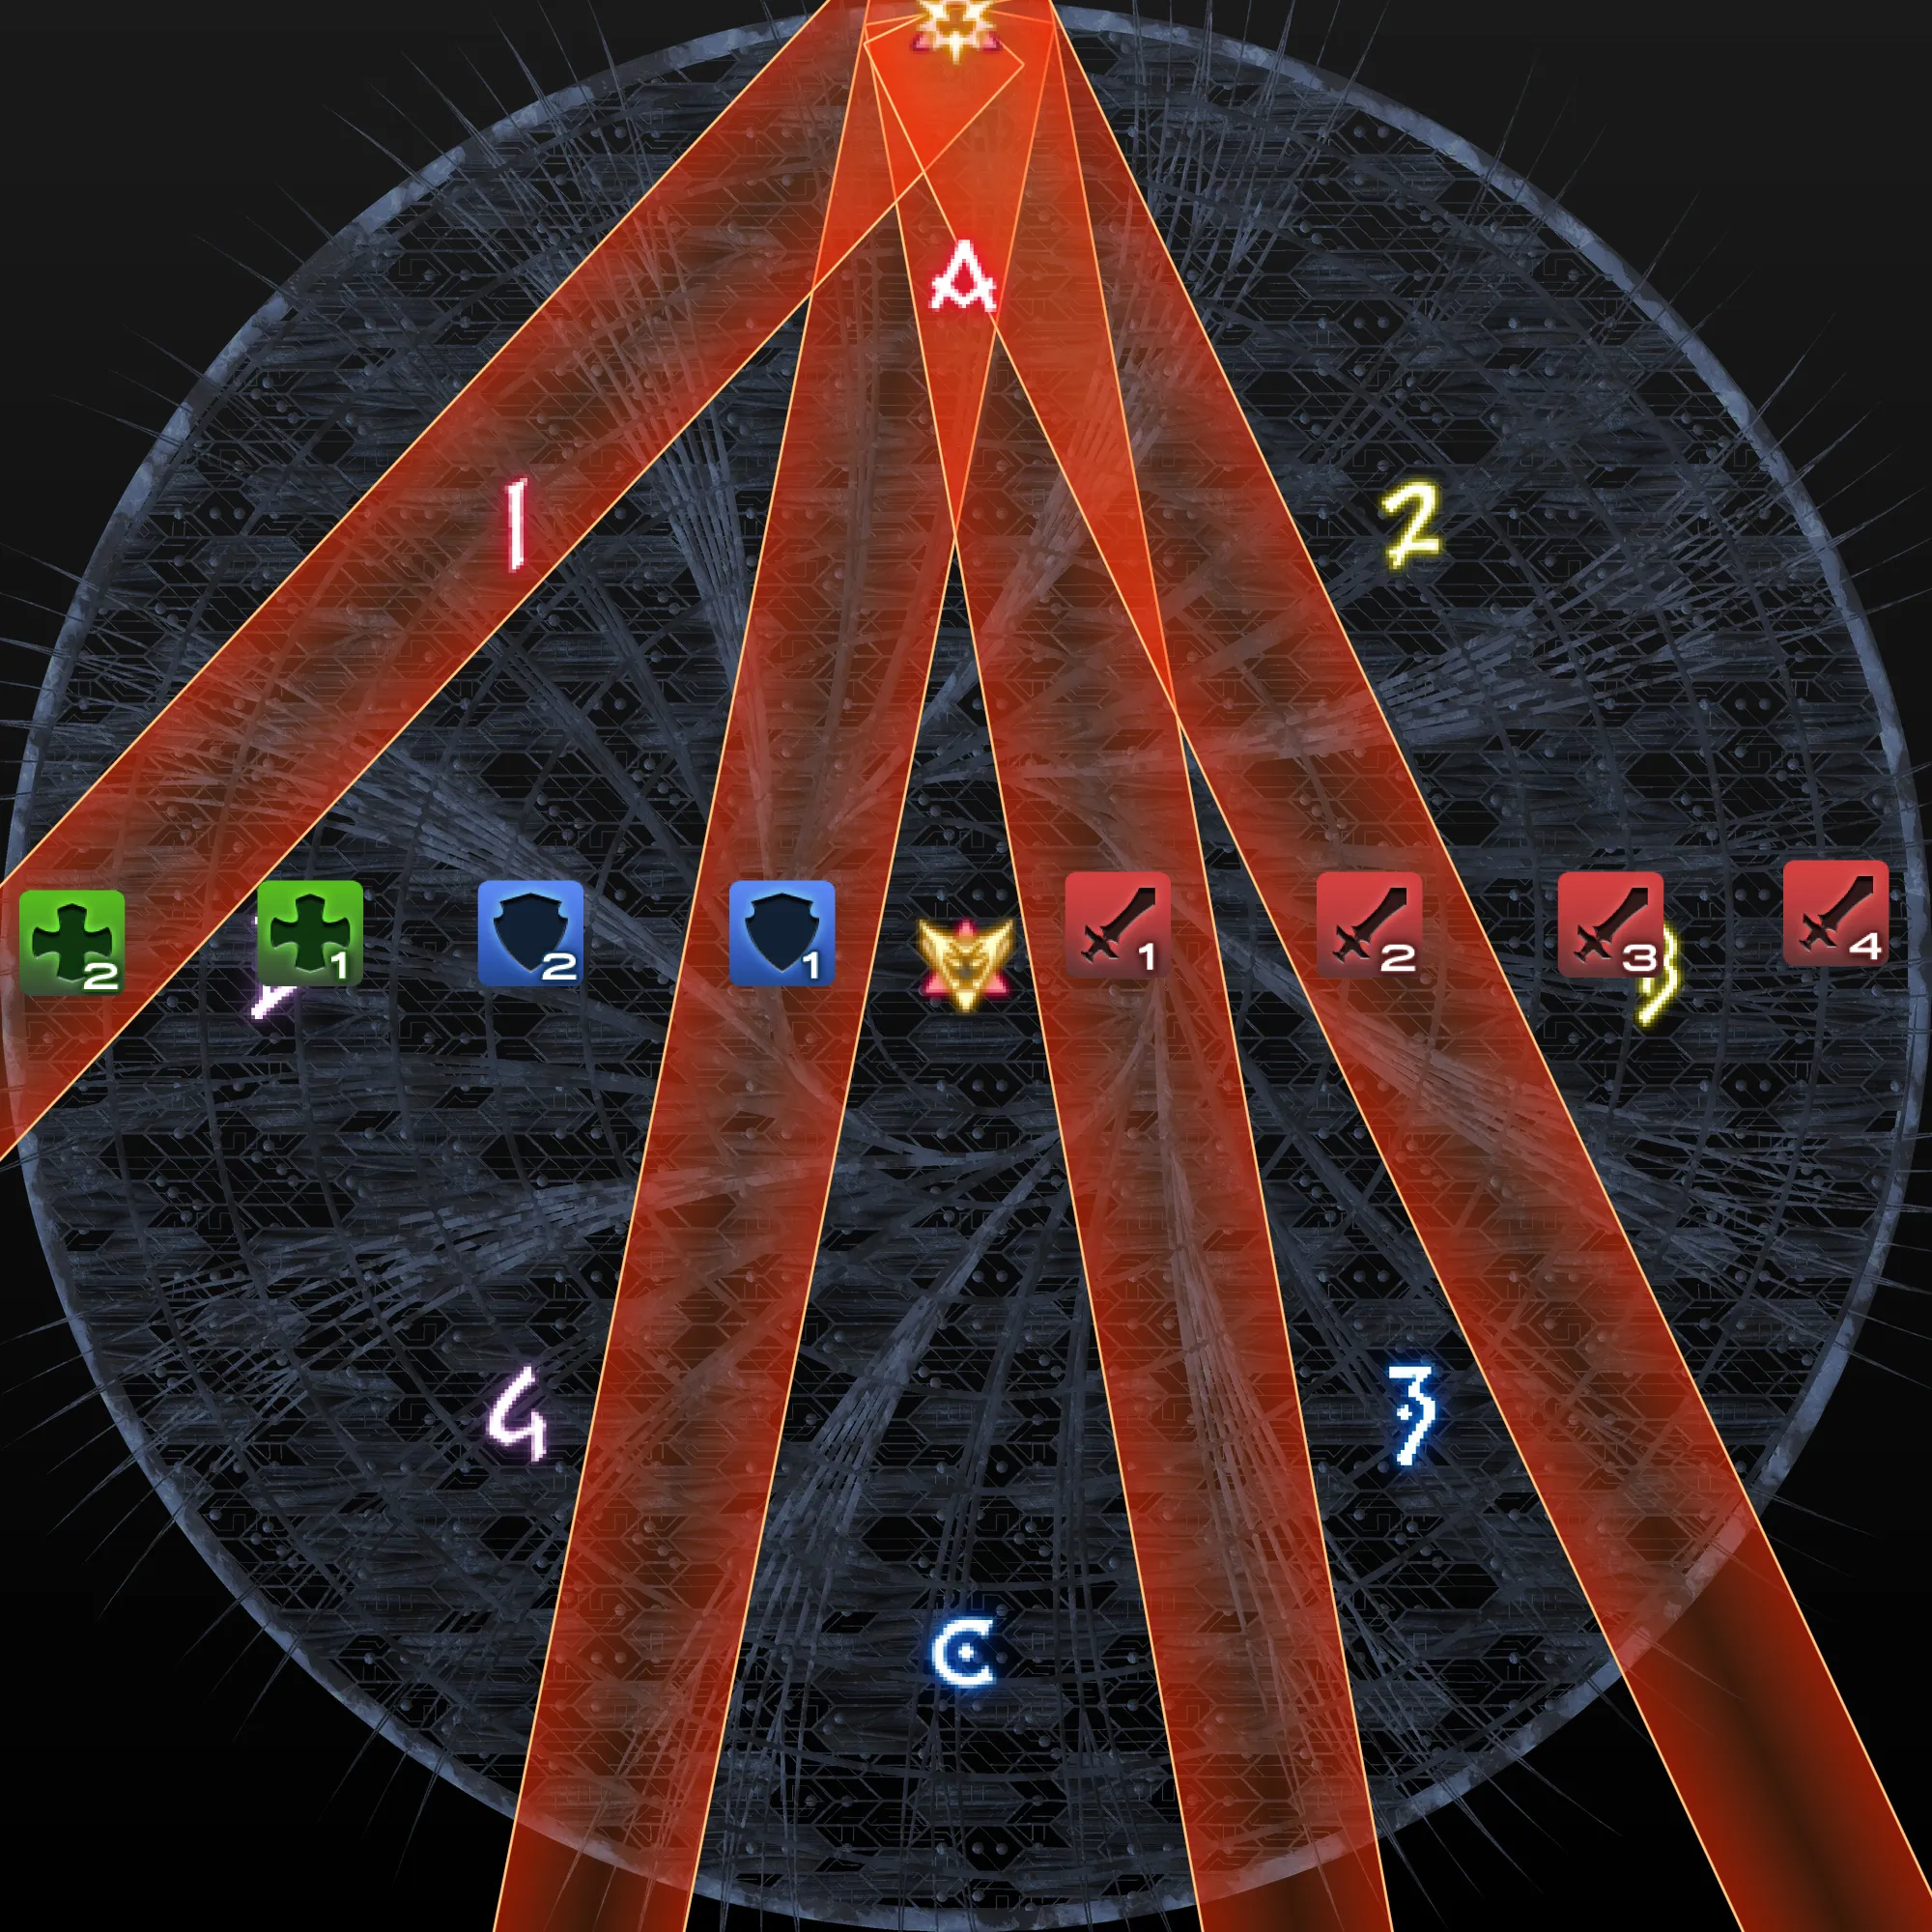
After rings resolve, all 8 players spread out West → East across the arena.
Boss shoots lasers at 2 random Supports and 2 random DPS:
- Hit players receive a Vuln and a tower spawns beneath them.
- The 4 players not hit soak the towers in left-to-right priority:
H1 > MT > D1 > D4
Step 3 — Confetti Debuff knockback + Ice/Lightning#
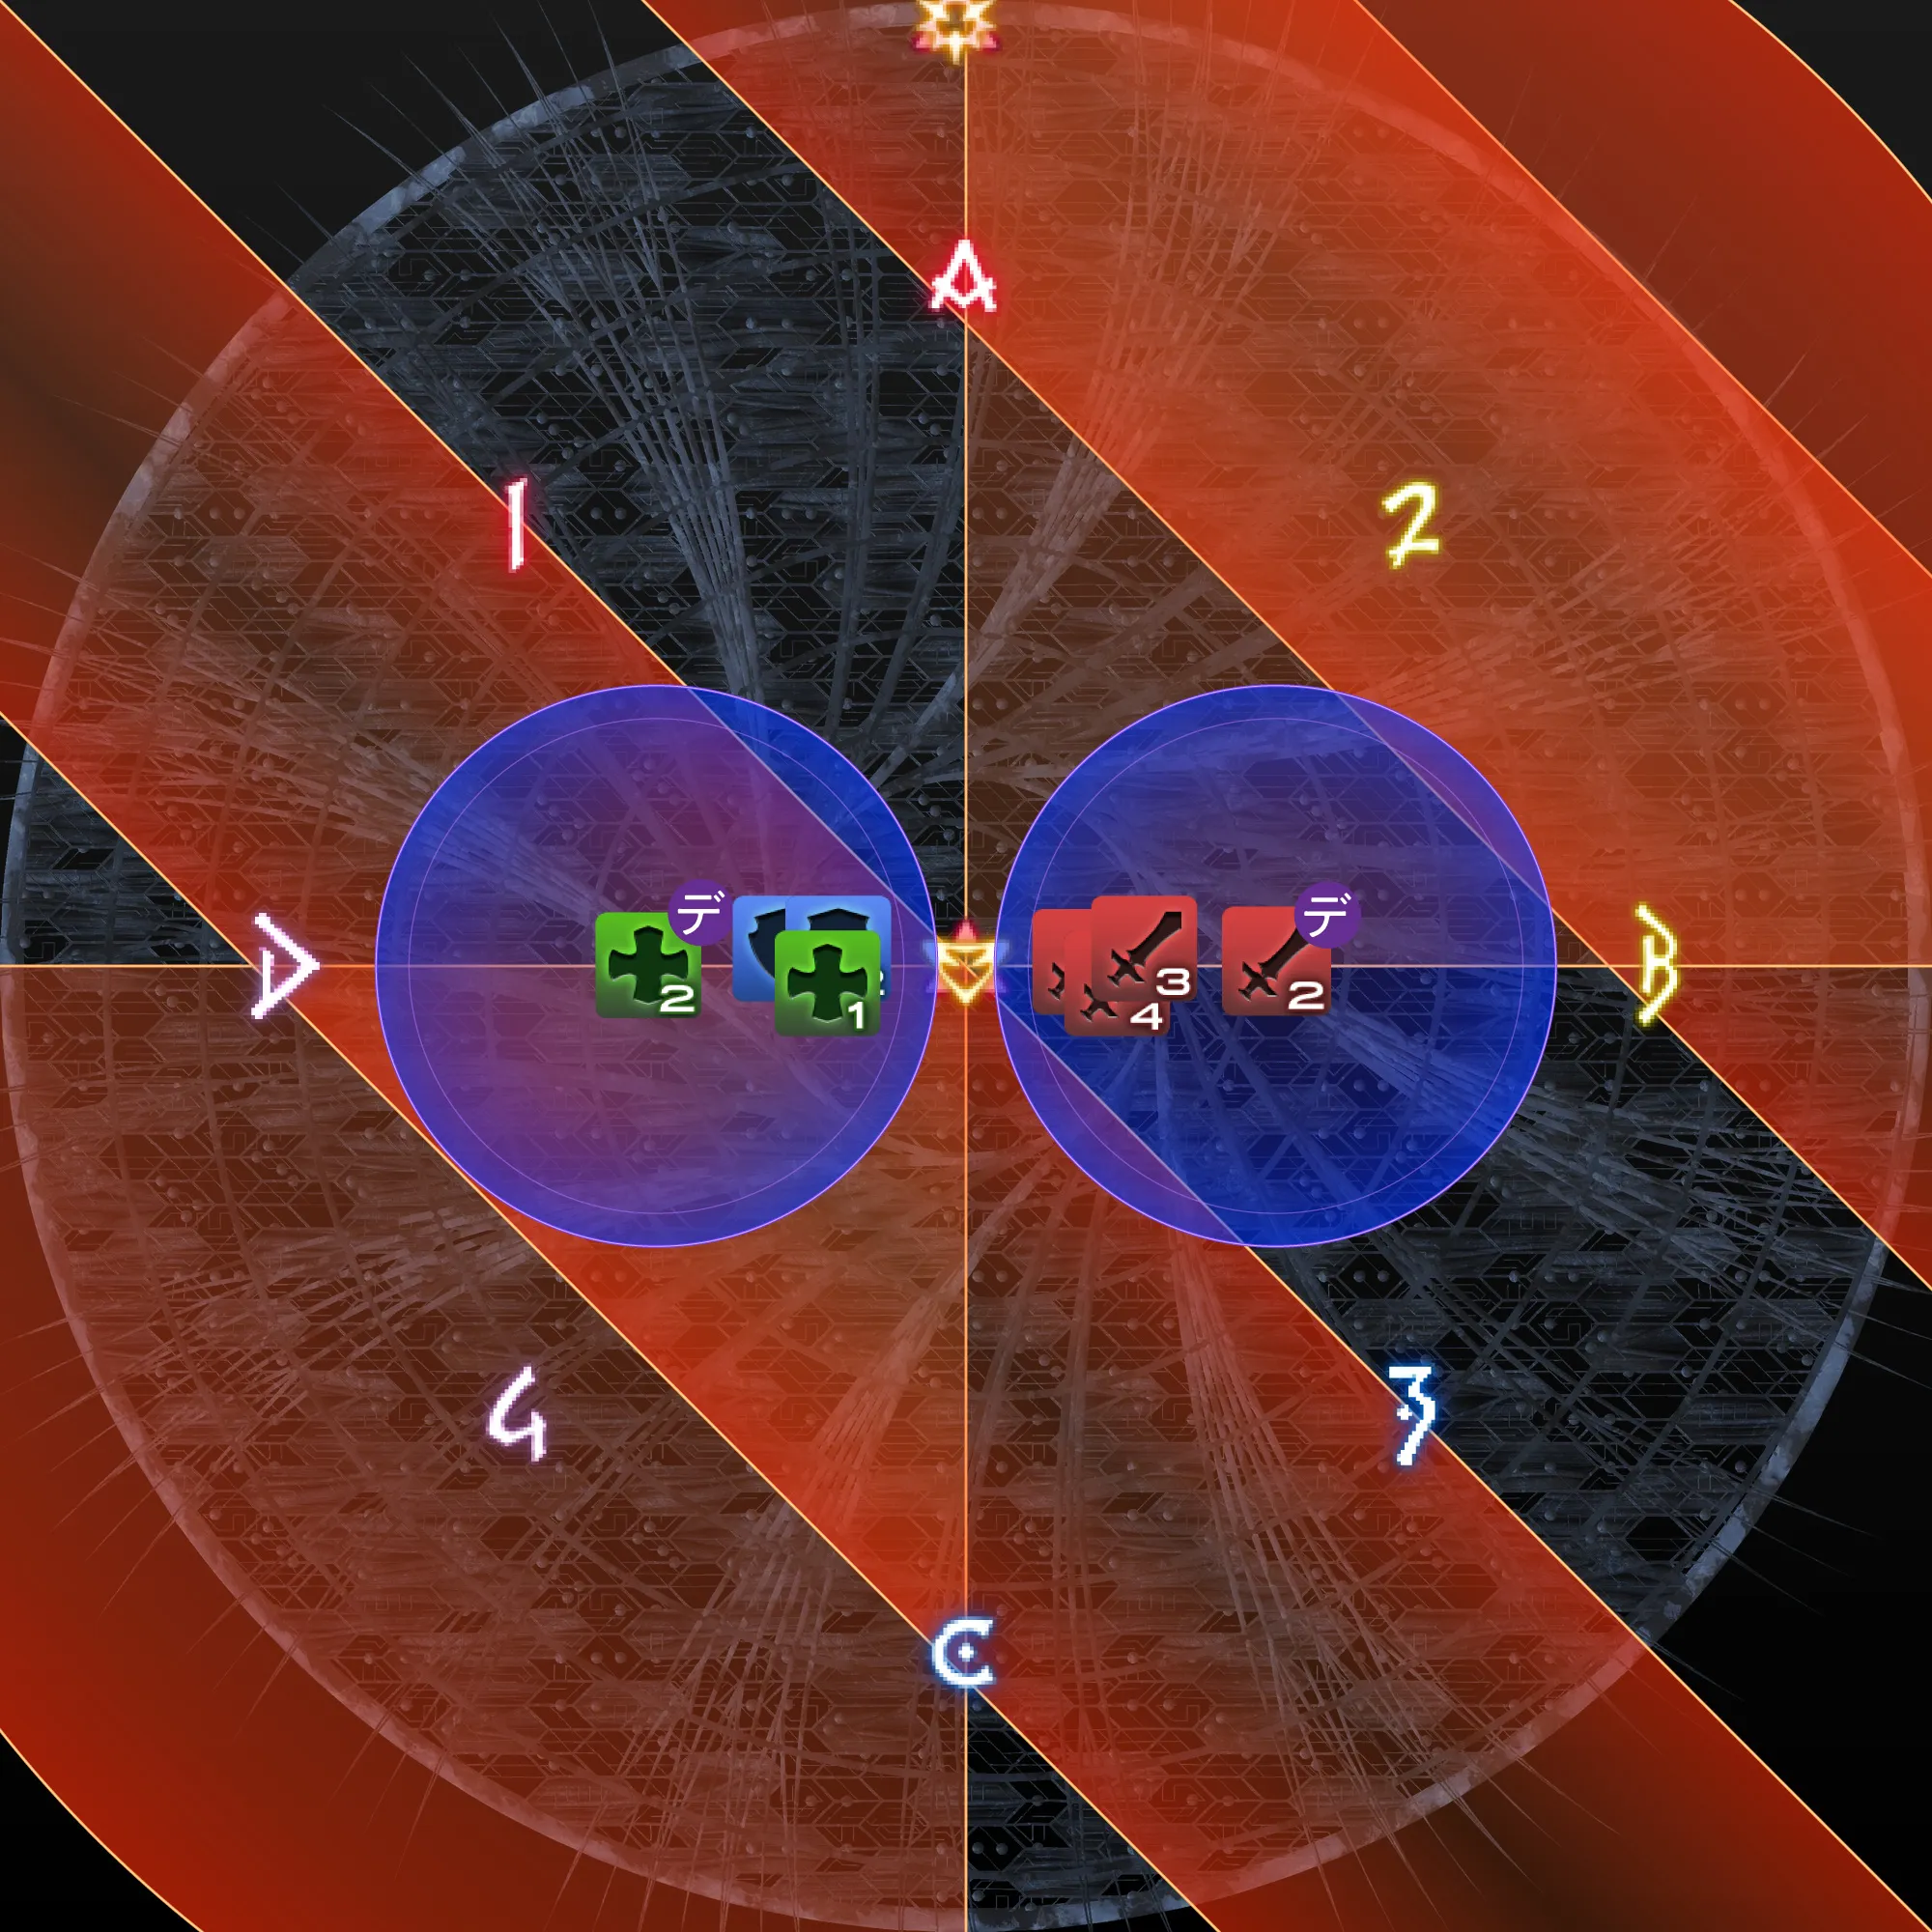
Boss applies Confetti Debuff to 1 Support and 1 DPS. On expiry it knockbacks all nearby players and passes to a random player. Use the knockback to dodge the next Ice/Lightning ring.
Differs from PF? See the PF-standard strat for comparison.
Graven Image 2#
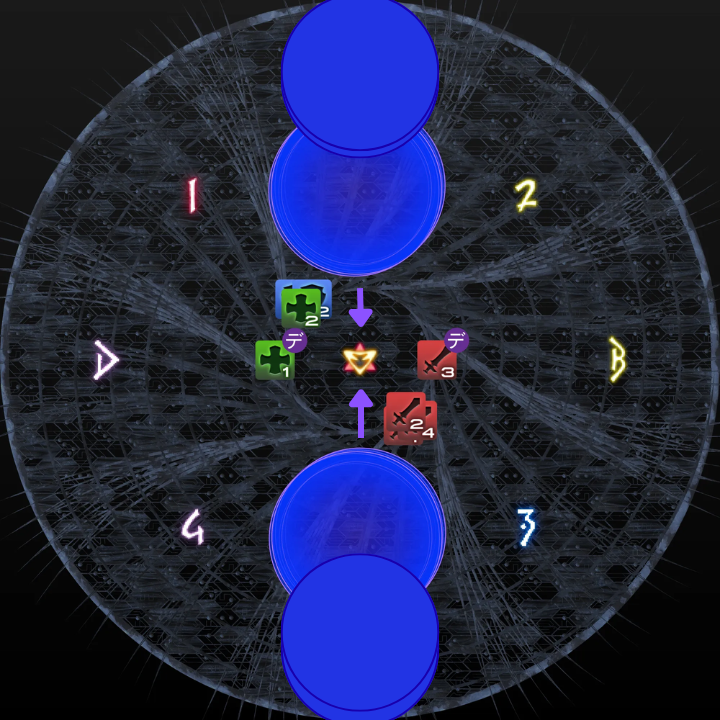
Light Party composition:
- LP1 (North): MT · H1 · D1 · D3
- LP2 (South): ST · H2 · D2 · D4
Step 1 — First Gravity puddles (North)#
Boss telegraphs a True or ? Ice AOE. Statue tethers all players in two sets:
| Tether | Type | Mechanic |
|---|---|---|
| Central Tether | Gravity | Stack AOE — stay together |
| Right Side Tether | Rock | Spread AOE that detonates Gravity Puddles |
LP1 stacks North on the marker to place the first Gravity puddle, dodging the Ice AOE. Spread out enough to see your own tethers.
When Gravity resolves, Rock players spread away from the Gravity stack:
- G1 (LP1): spread left facing boss
- G2 (LP2): spread right facing boss
Gravity players move down the middle.
Step 2 — Ruin III Tankbuster + Half-room cleave#
Boss casts Ruin III Tankbuster — tank swap, face buster North. Statue summons an orb for a half-room cleave — dodge to the safe half. ST uses invuln.
Step 3 — Second Gravity puddles (South)#
LP2 moves South to place the second set of Gravity puddles. Repeat the same spread pattern:
- G1: left facing boss · G2: right facing boss
- Gravity players down the middle
Boss does another half-room cleave — dodge to safe half.
Step 4 — Confetti knockback through puddles#
Boss applies Confetti Debuff to 1 Support and 1 DPS. Party stacks inside the hitbox:
- Confetti players move out to max melee, next to puddles
- Supports with Confetti → North · DPS with Confetti → South
Confetti expires → knockback drives the party through the Gravity Puddles to pop them for the puzzle. Confetti players move back in to help soak after.
Differs from PF? See the PF-standard strat for comparison.
Graven Image 3 — Arrows (Tele-Portent)#
Step 1 — Place your teleporters#
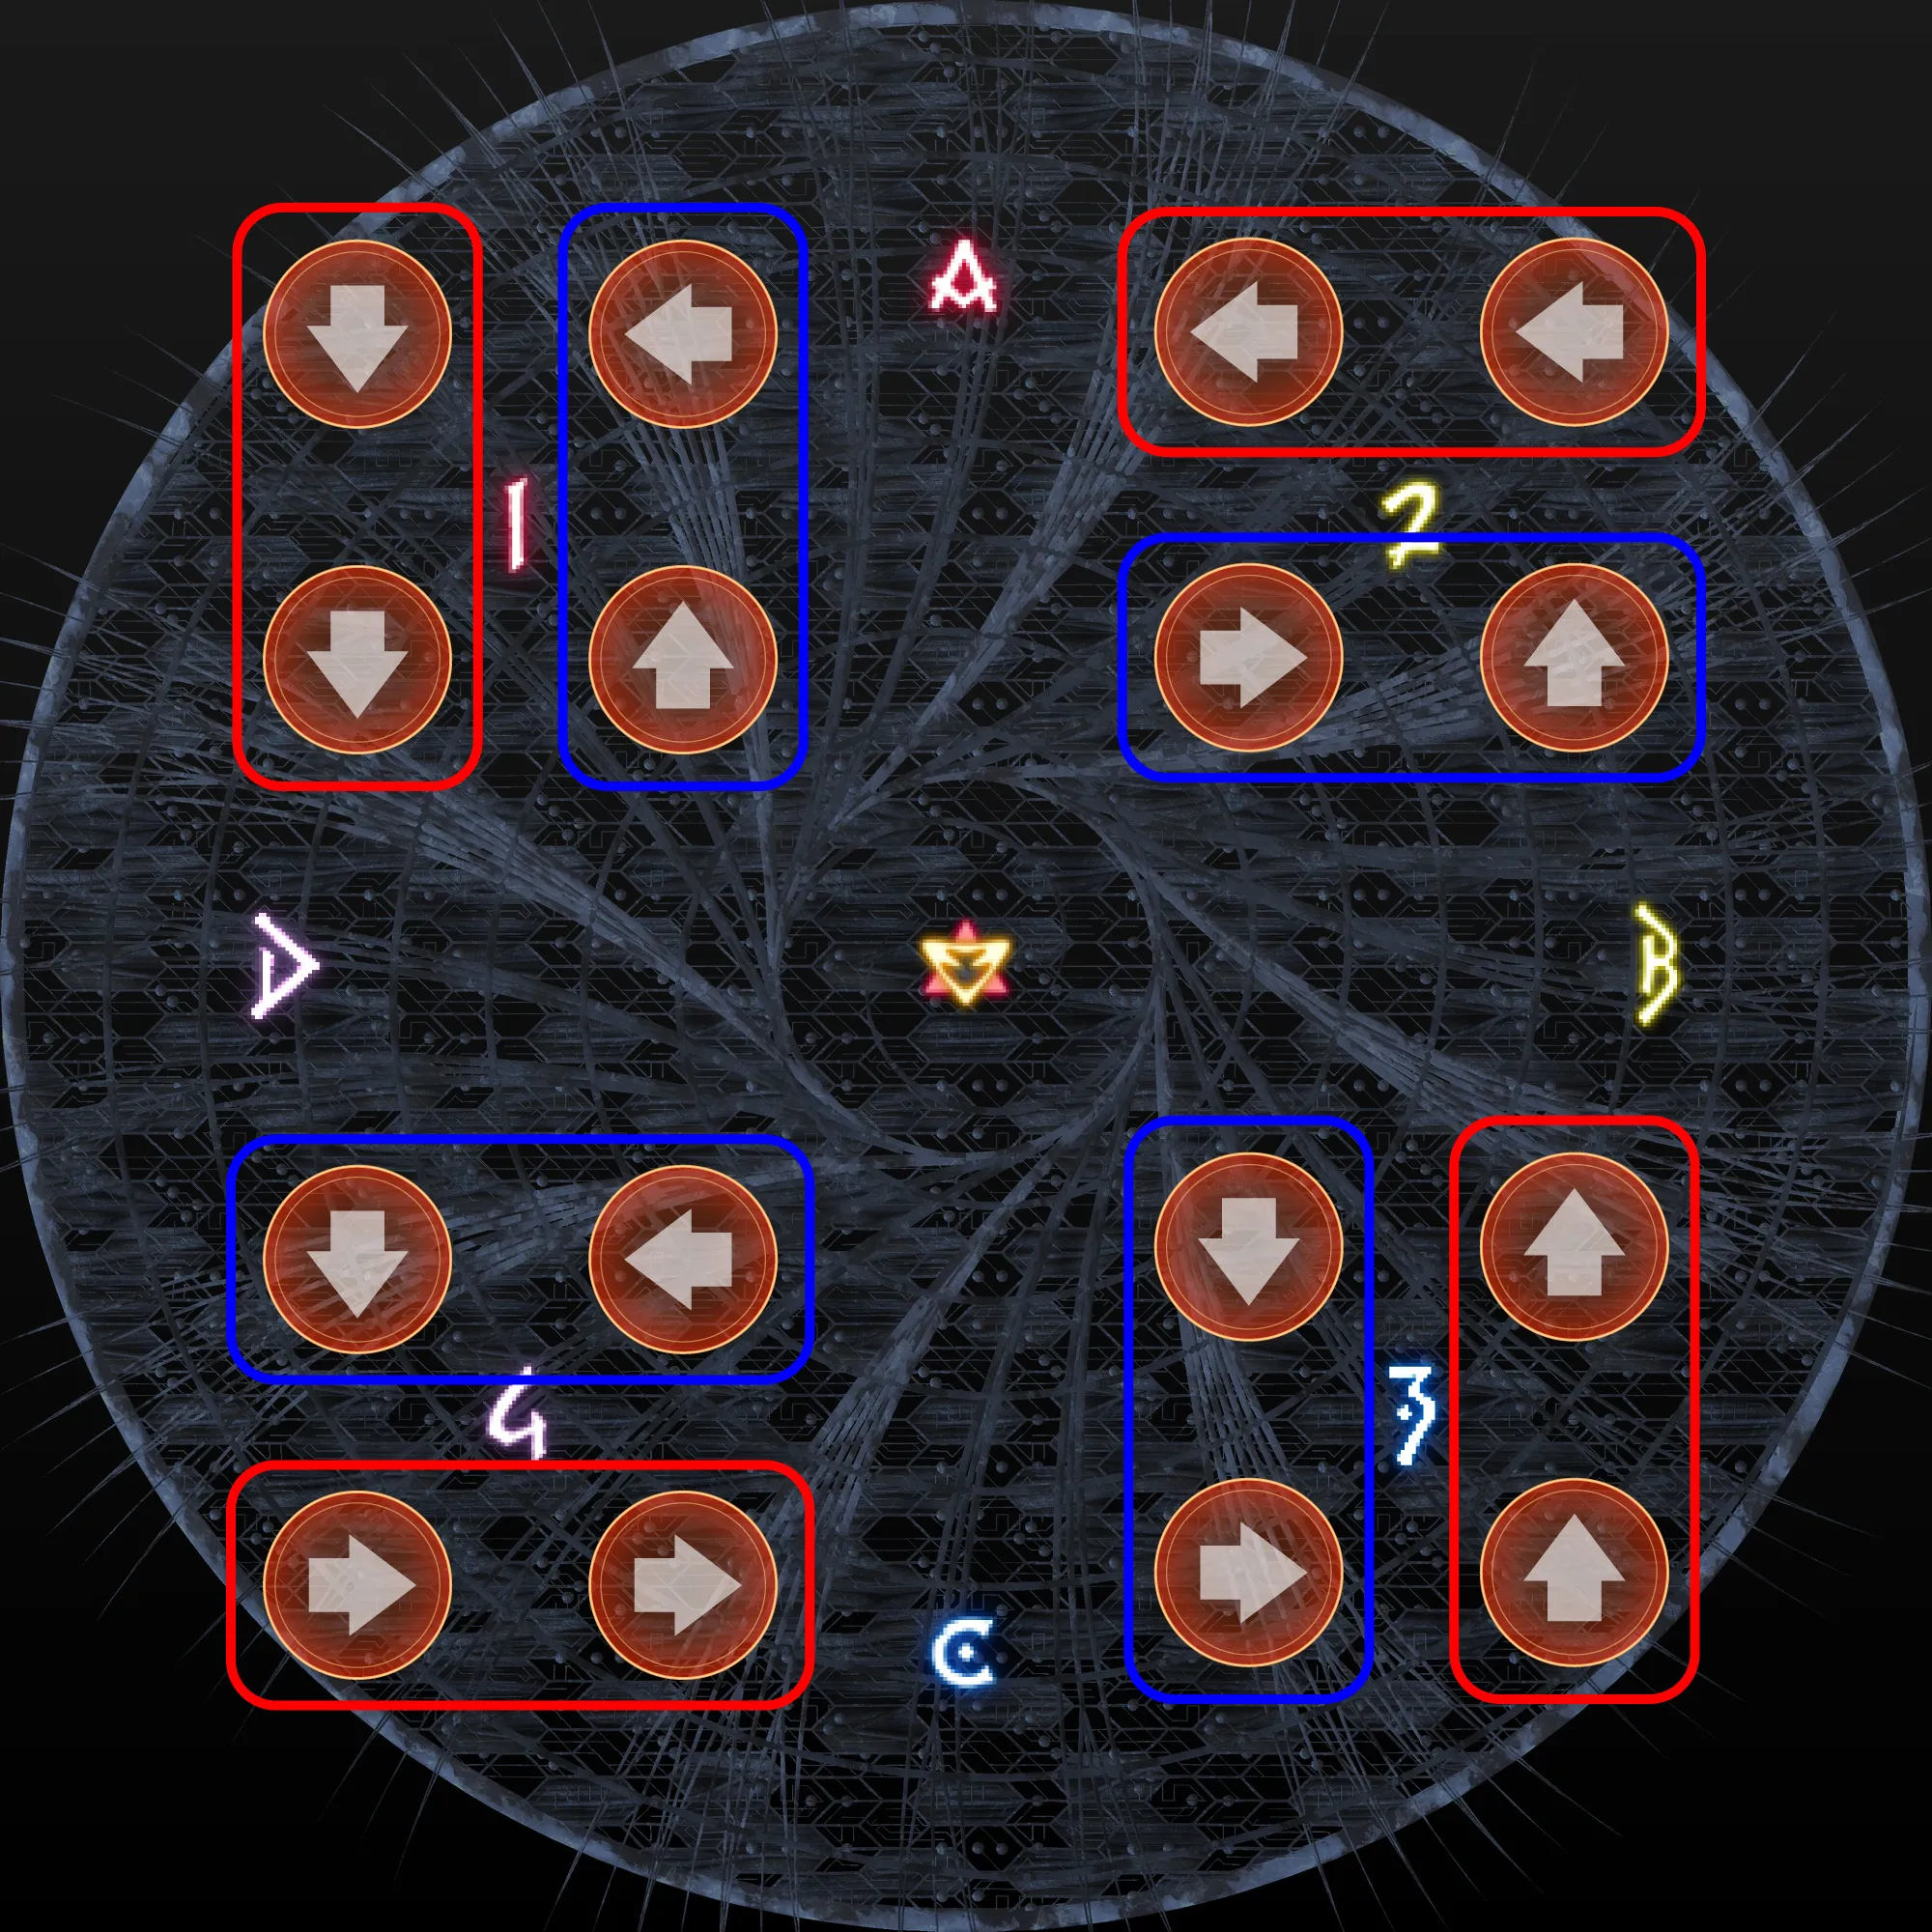
Boss casts Tele-Portent, giving each player 2 arrow debuffs. When they expire they place a teleporter. You will have either:
- 2 matching arrows — same debuff (①)
- 2 different arrows — different debuffs (②)
Step 2 — Tether resolution#
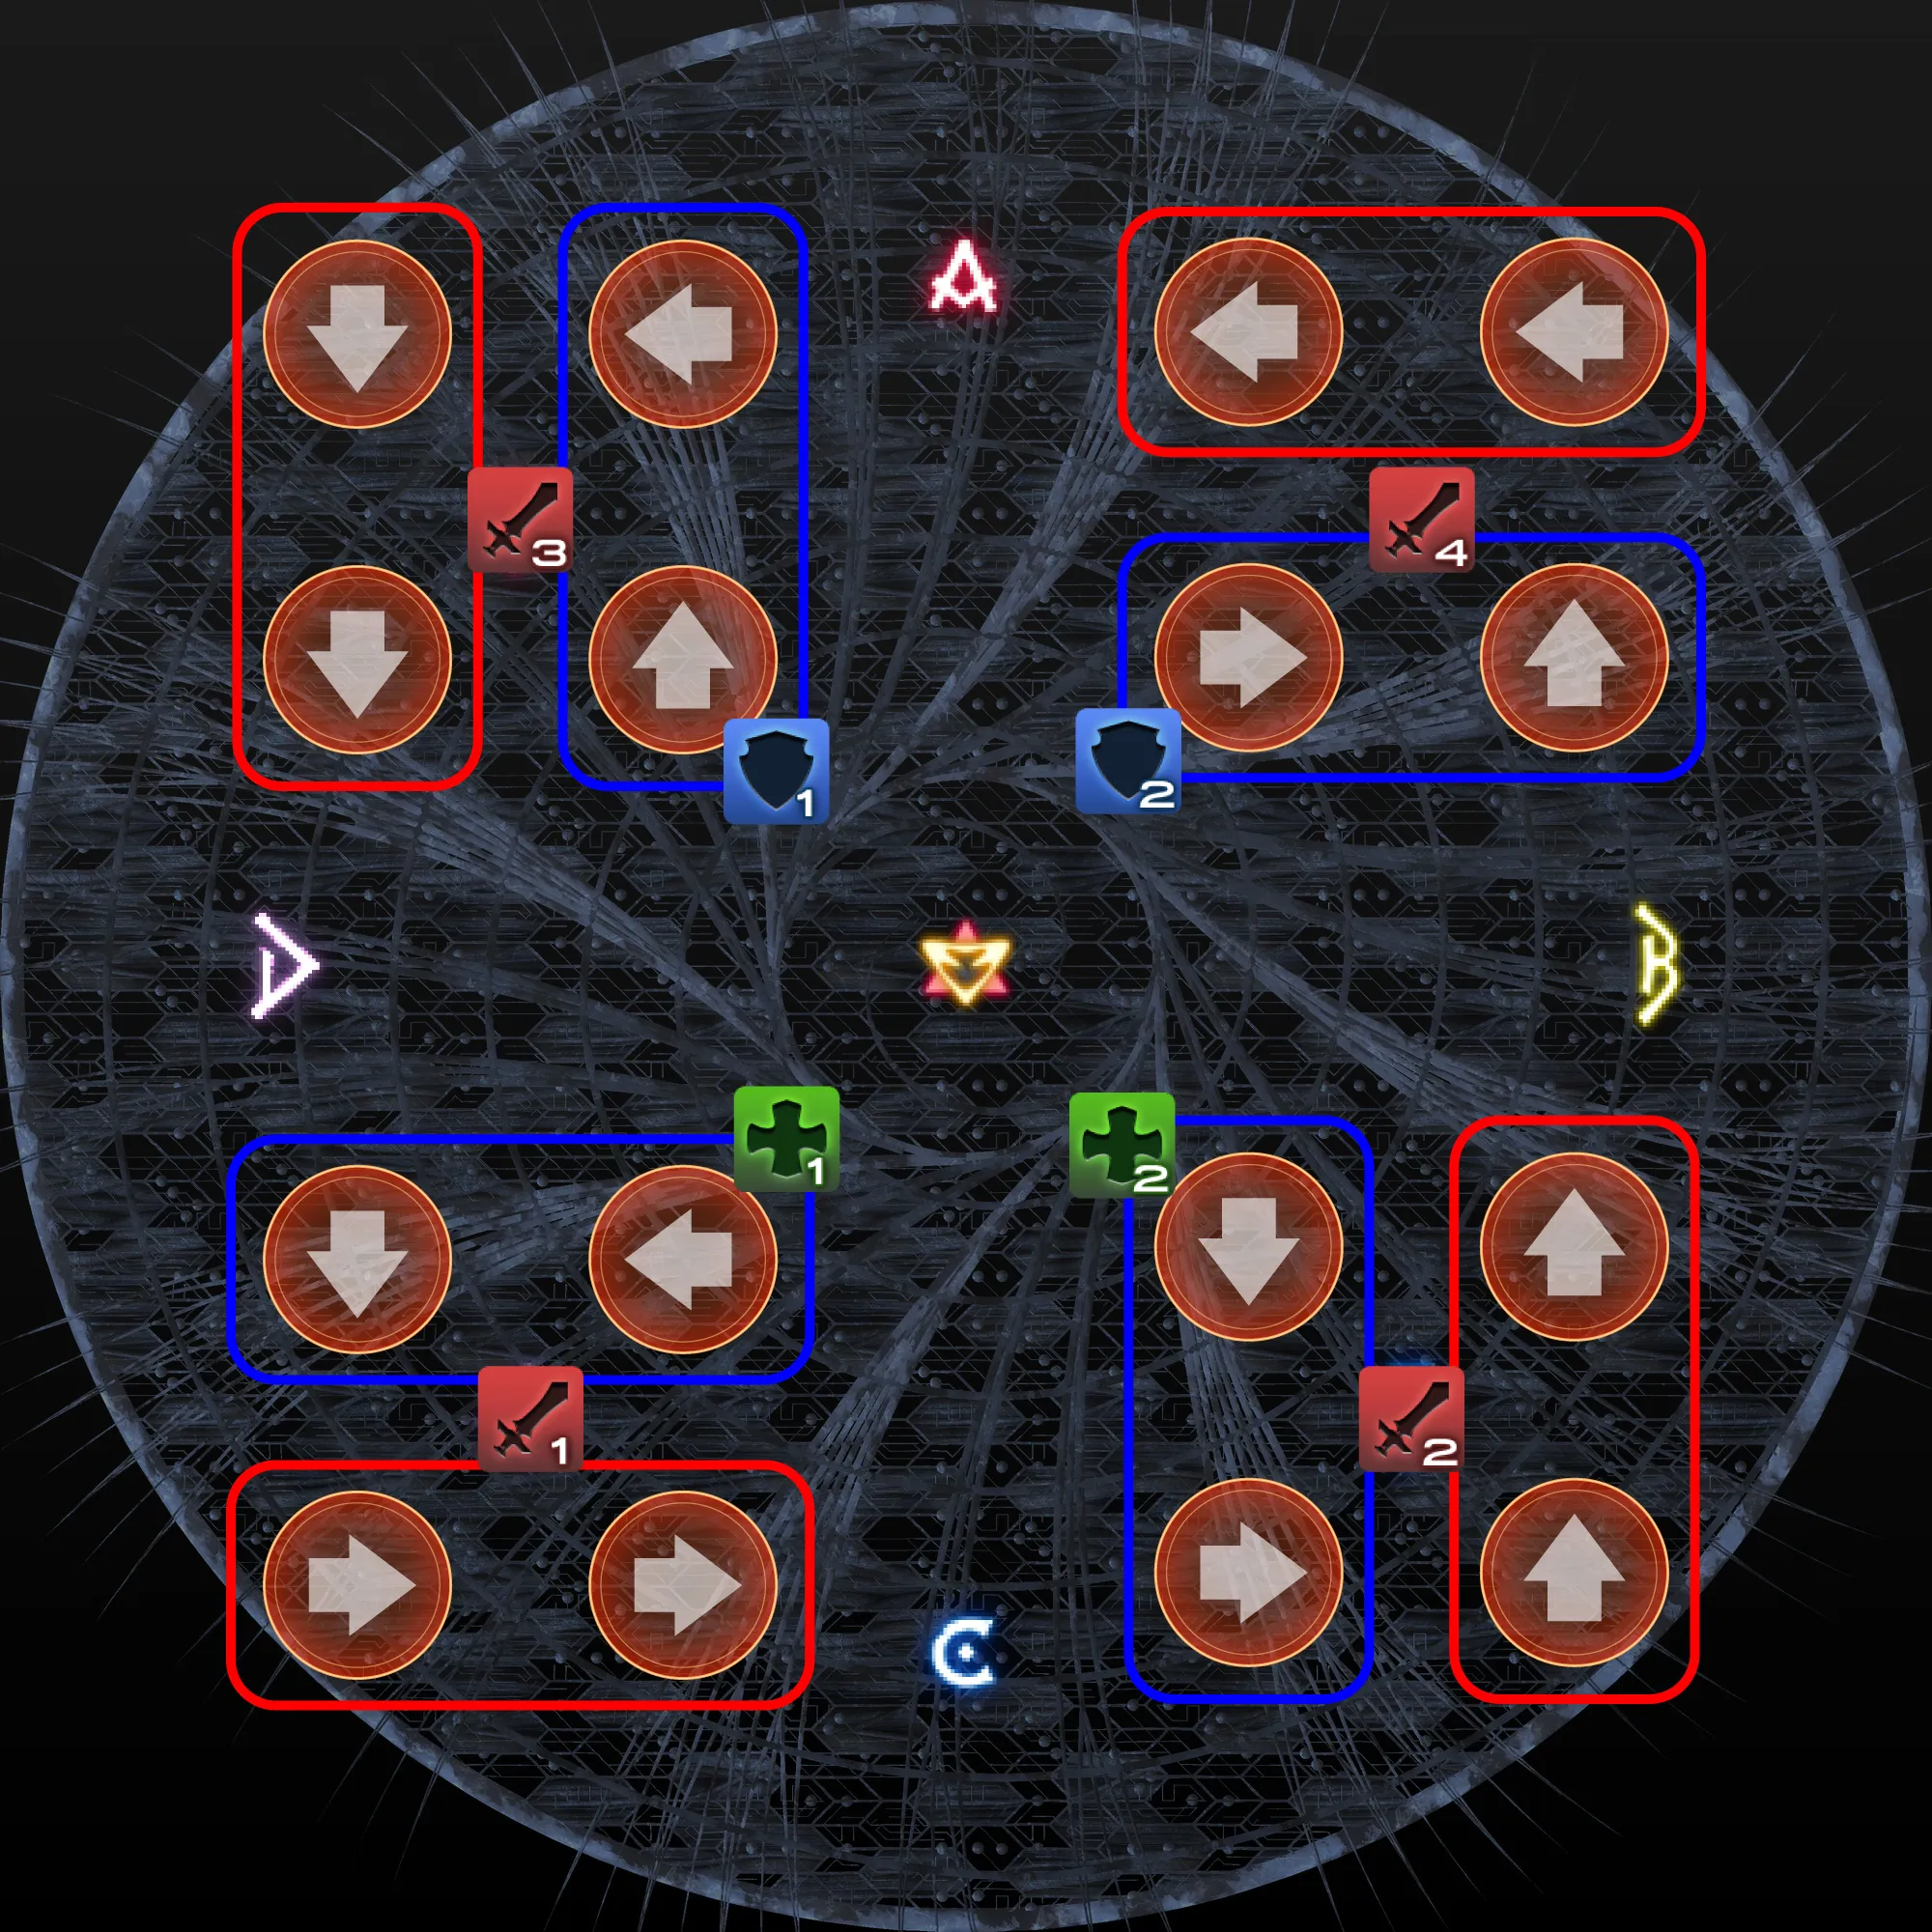
After teleporters are placed, statues tether to players:
| Tether colour | Resolve |
|---|---|
| Yellow statue | Move outside (away from center) |
| Purple statue | Stay middle on your colour waymark |
Differs from PF? See the PF-standard strat for comparison.