 Bubble Mew
UMAD — Phase 1 (Party Finder)#
PF-standard resolution for this phase, based on the community guide at yan-flash.com. Mechanic names below use our in-game terms; where the Japanese guide's name is useful for cross-referencing a PF listing it's noted in parentheses. For our team's version see the Bubble Mew strat. Role abbreviations (MT/ST/H1/H2/D1/D2/D3/D4) are explained in the fundamentals.
Boss Overview#
Phase 1 is mechanic-dense and built around a recurring true / false "deception" theme: a telegraphed AoE either resolves as shown (true) or does the opposite (false). Layered on top are statue line mechanics, tower soaks, and timed debuff-passes. PF convention pushes hard damage here — see the DPS note at the bottom.
Mechanic Timeline#
| Mechanic | Notes |
|---|---|
| Opening Tankbuster (Barrir Ruin Ga) | 90° cone, hits enmity #1 then #2 — tank swap |
| Graven Image 1 (Gods' Statues 1st) | Line lineup + Fire/Ice deception rings (? orbs) |
| Towers + Beams | 4 take beams in a line, other 4 soak towers |
| Confetti pass (Next Next Trap) | 1 support + 1 DPS timed debuff — role split |
| Judgment Light | Raidwide |
| Hyperdrive | 3× sequential tankbuster |
| Graven Image 2 (Gods' Statues 2nd) | Gravity-bomb lines + half-room cleave |
| Confetti pass #2 | Second role-split debuff pass |
| Ruin III | Half-arena cleave |
| Graven Image 3 (Tele-Portent) | Sleep/Confusion teleport arrows → P2 at ~14.9% |
Opening Tankbuster#
90° frontal cone that hits enmity #1, then enmity #2 in sequence. Standard tank swap so each tank eats one hit; face the boss away from the party.
Graven Image 1 — Lineup + Fire/Ice Deception#
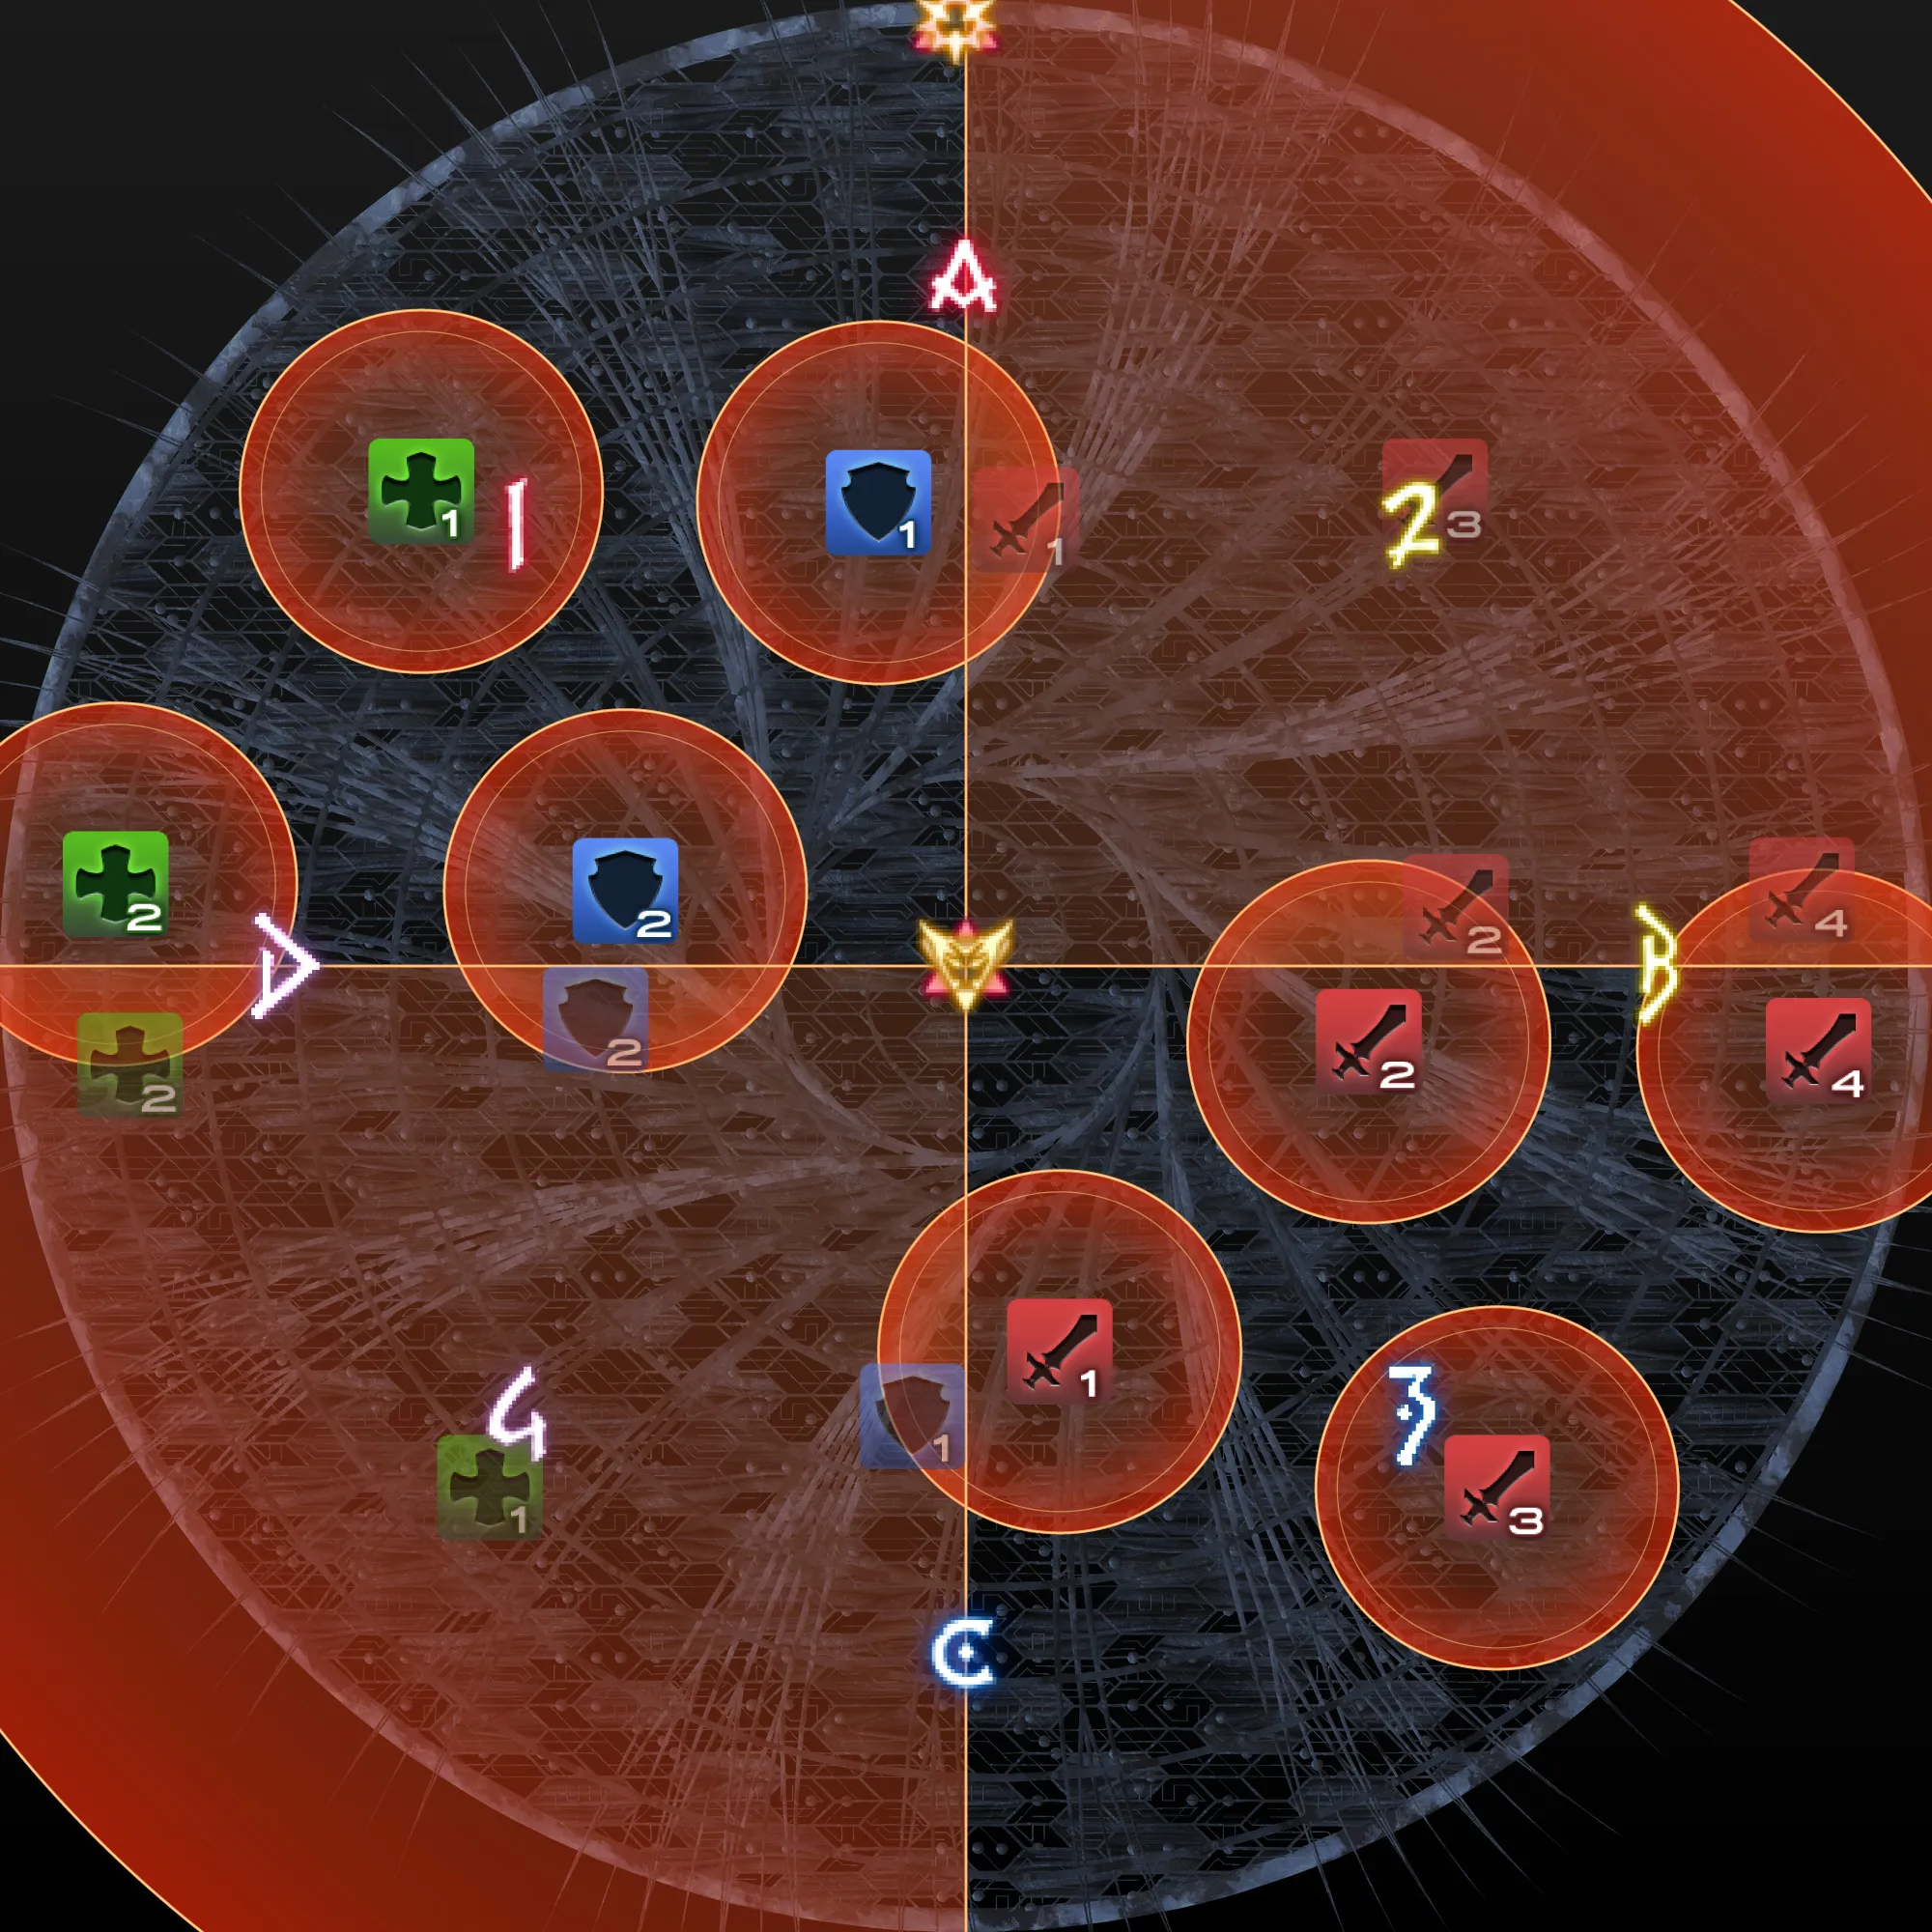
A statue tethers all Supports or all DPS and the party lines up while resolving a pair of elemental rings (Fire + Ice/Lightning). The ? orb rule flips the displayed mechanic:
- ? Fire orb → reverse the shown Stack/Spread.
- ? Ice orb → stand inside the AoE instead of dodging the cone.
PF lineup (community standard): Supports West, DPS East.
| ← West (Supports) | East (DPS) → |
|---|---|
| H1 · H2 · MT · ST | D1 · D2 · D3 · D4 |
Towers + Beams#
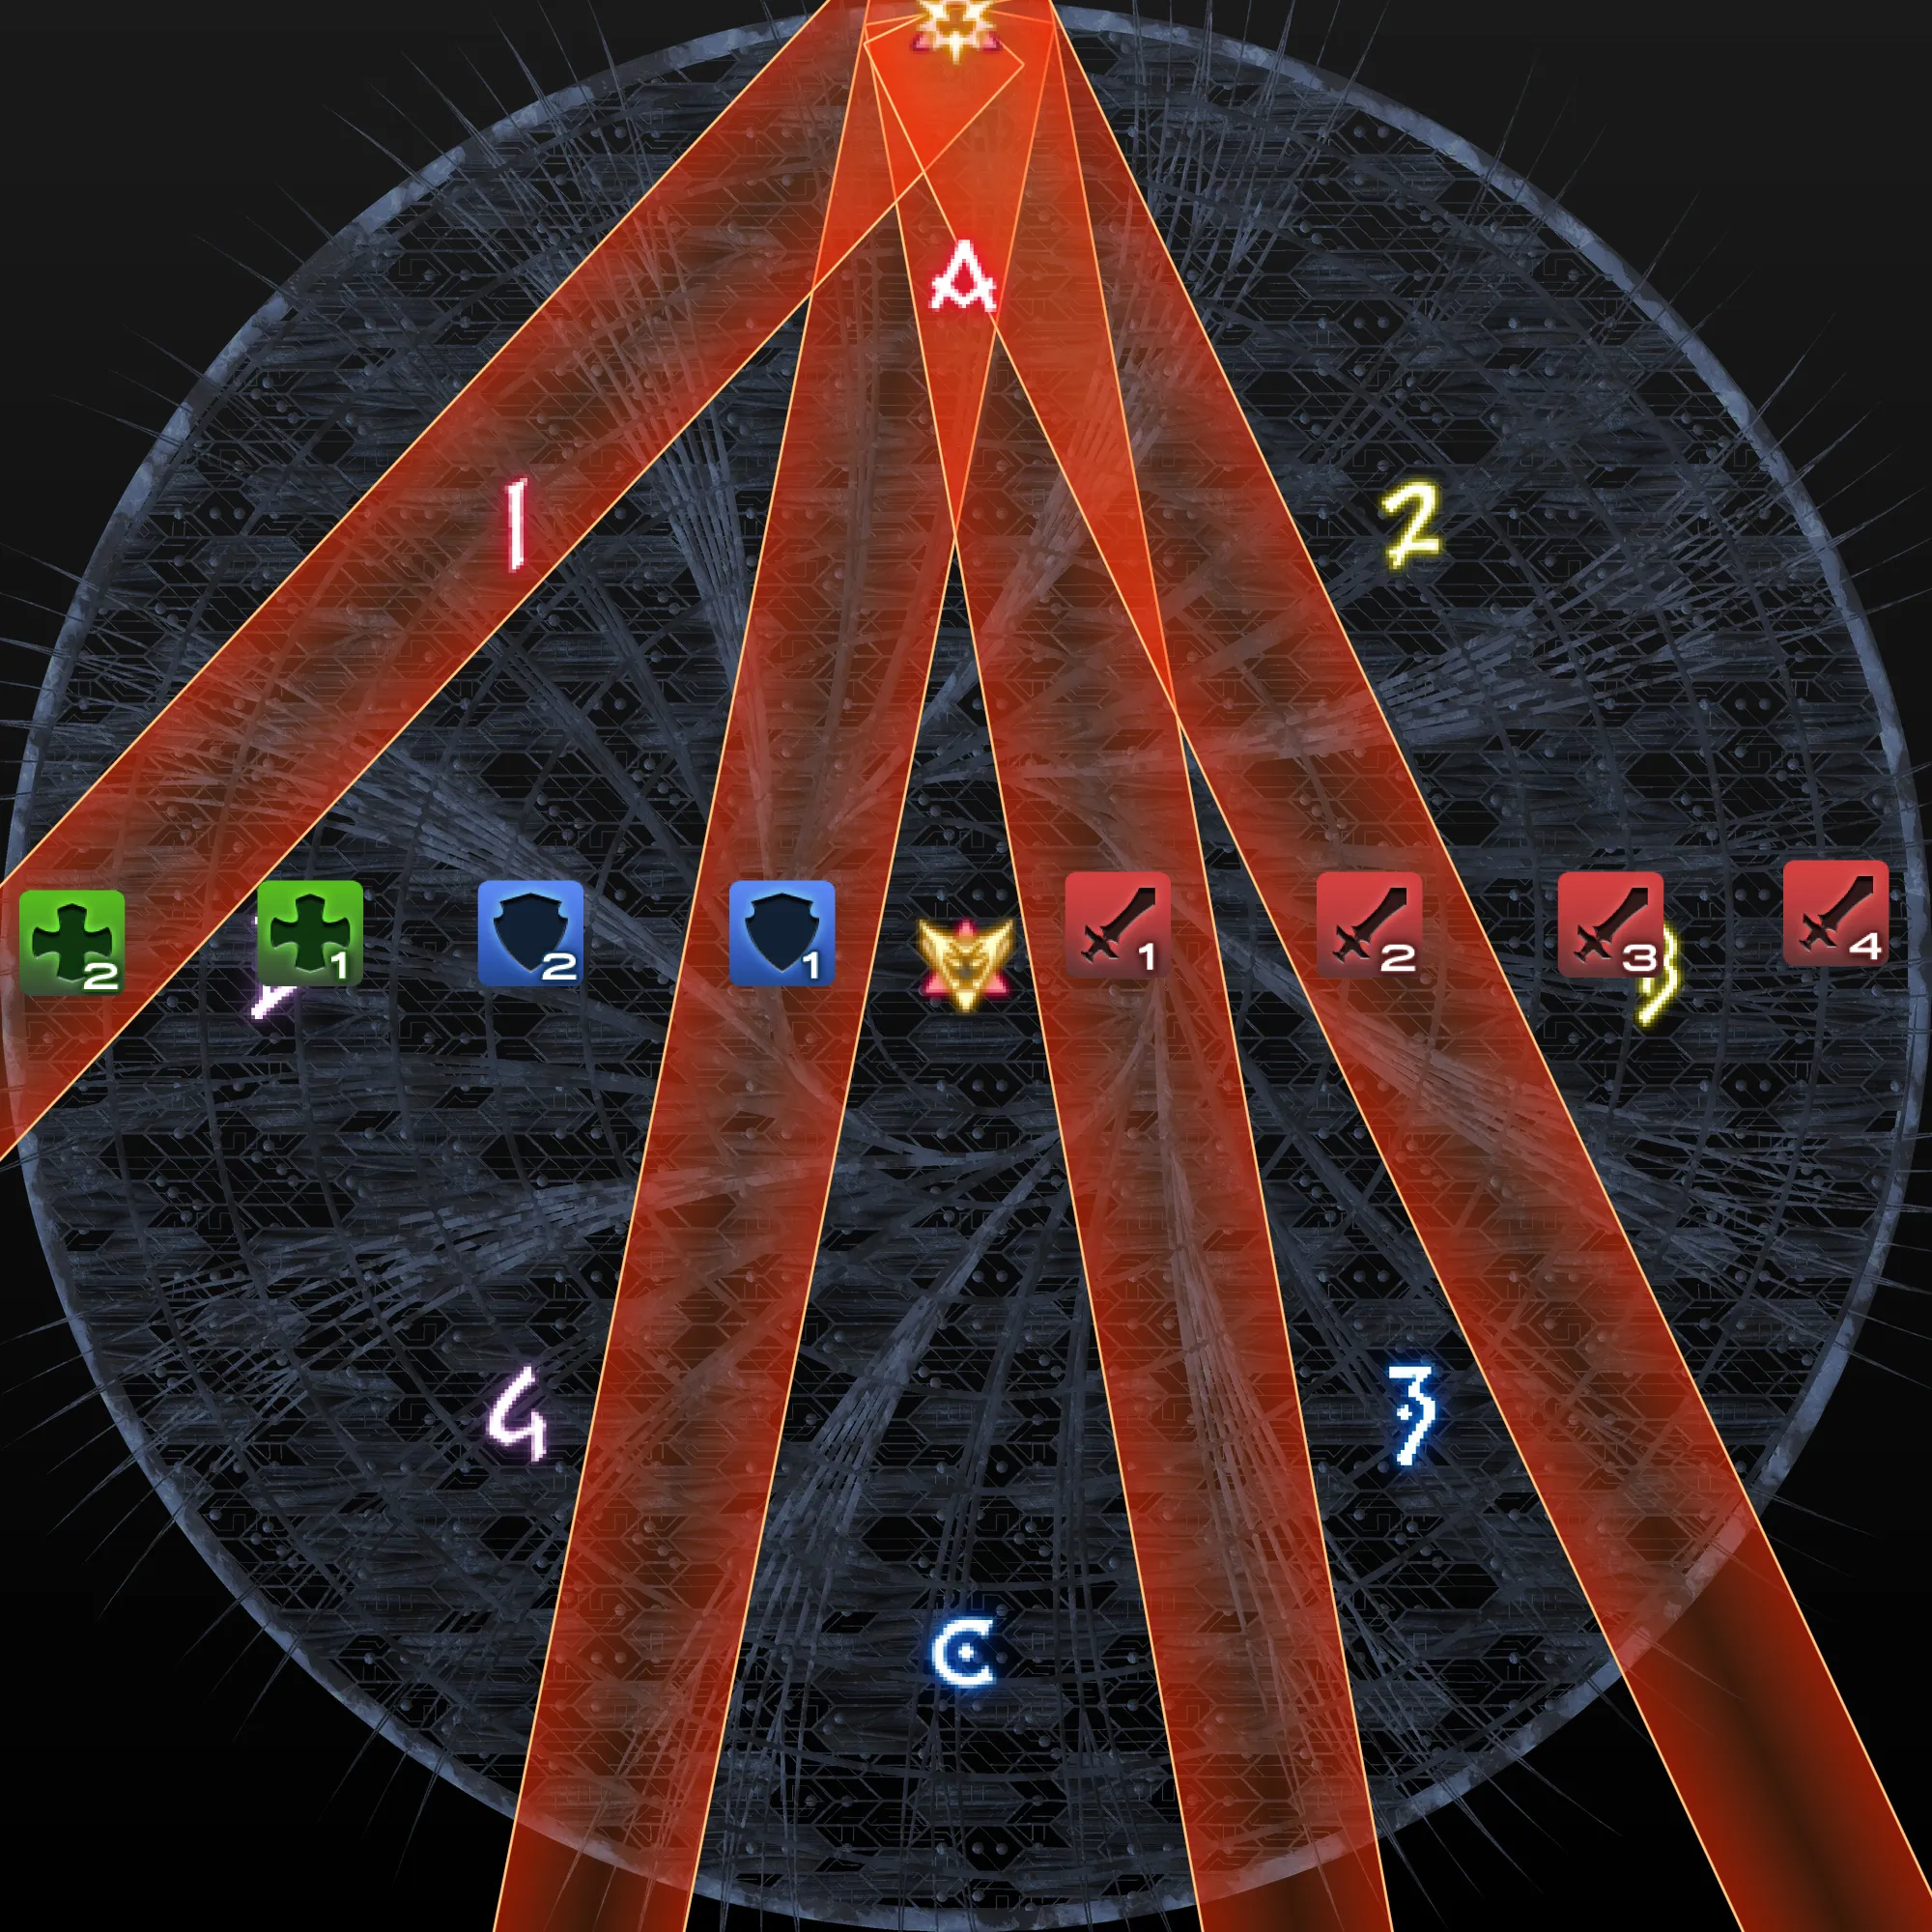
The boss fires beams at 4 players in a horizontal line (the source describes a support + DPS split); the 4 players who did not take a beam soak the towers. L > R SOAK.
Confetti Pass (Role Split)#
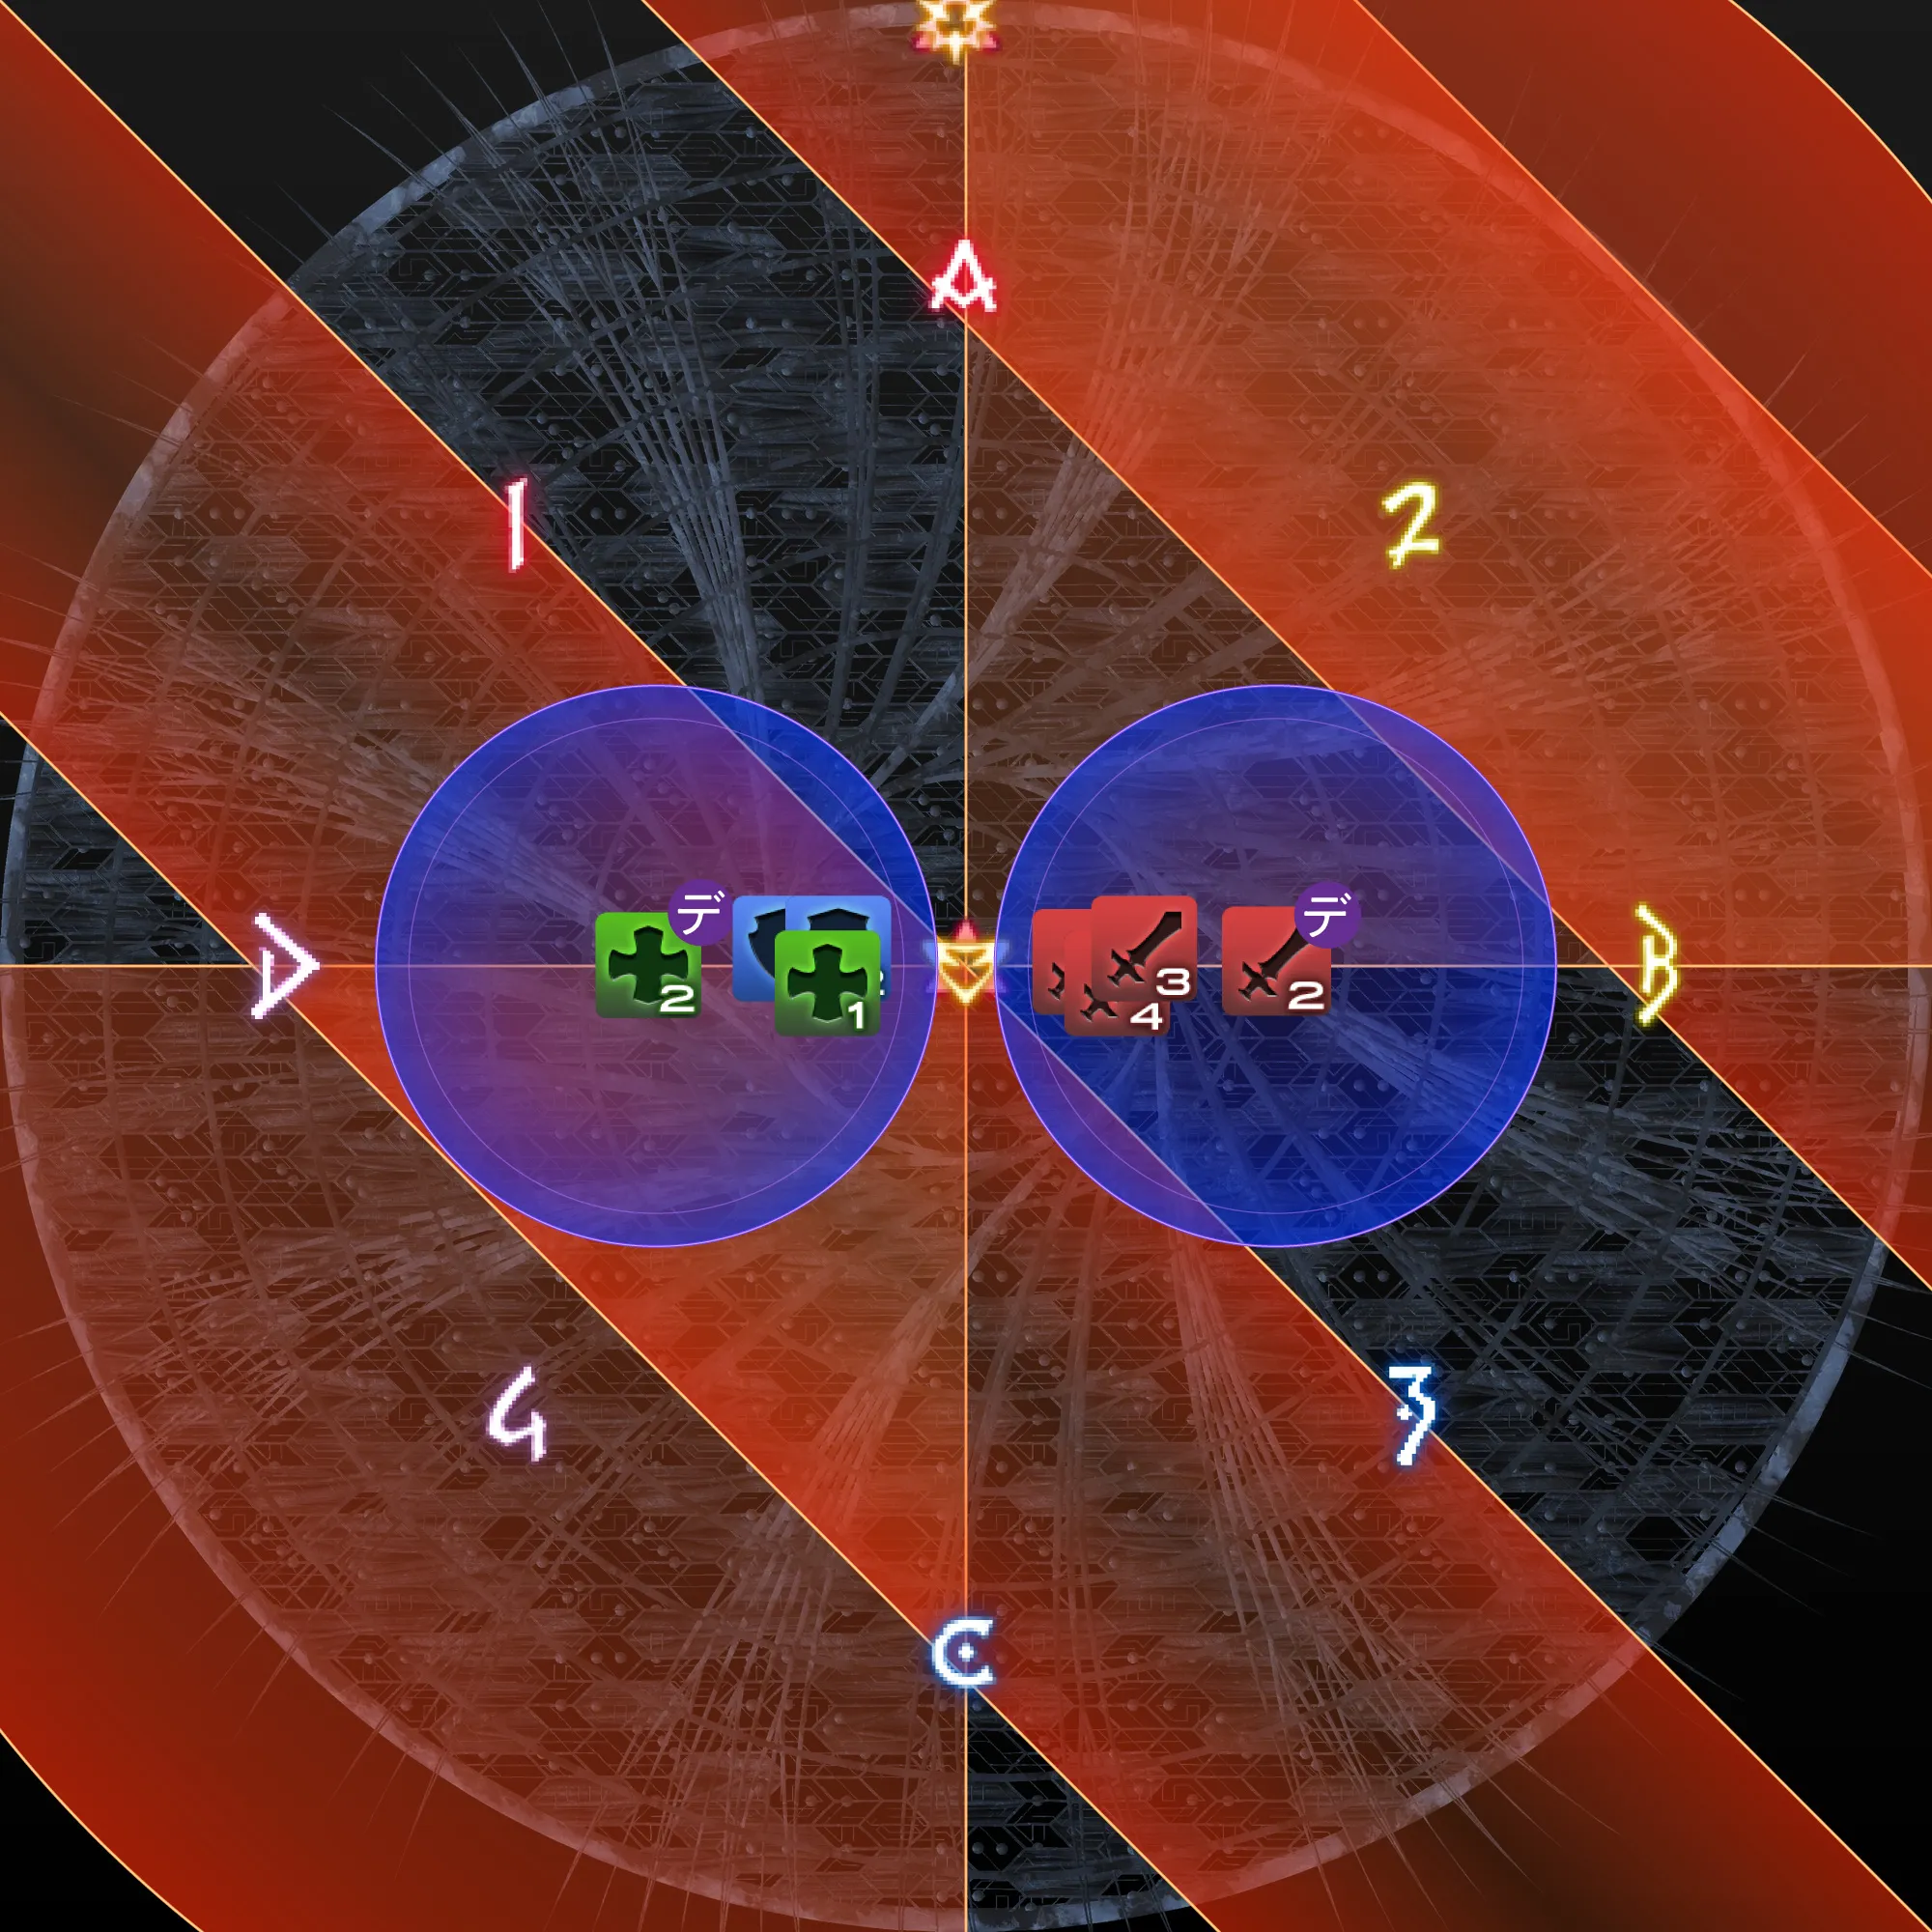
One support and one DPS receive timed debuffs that explode at 0 seconds, applying a knockback and passing to a new player. The party divides by role to share the knockback and stack damage:
- Supports → West
- DPS → East
Use the resulting knockback to set up for the following mechanic.
Judgment Light#
Unavoidable raidwide. Healers top the party; pop a party mitigation.
Hyperdrive#
Three sequential tankbusters. Plan tank cooldowns across all three; tank swap as needed so neither tank takes consecutive hits unmitigated.
Graven Image 2 — Gravity Lines + Half-Room Cleave#
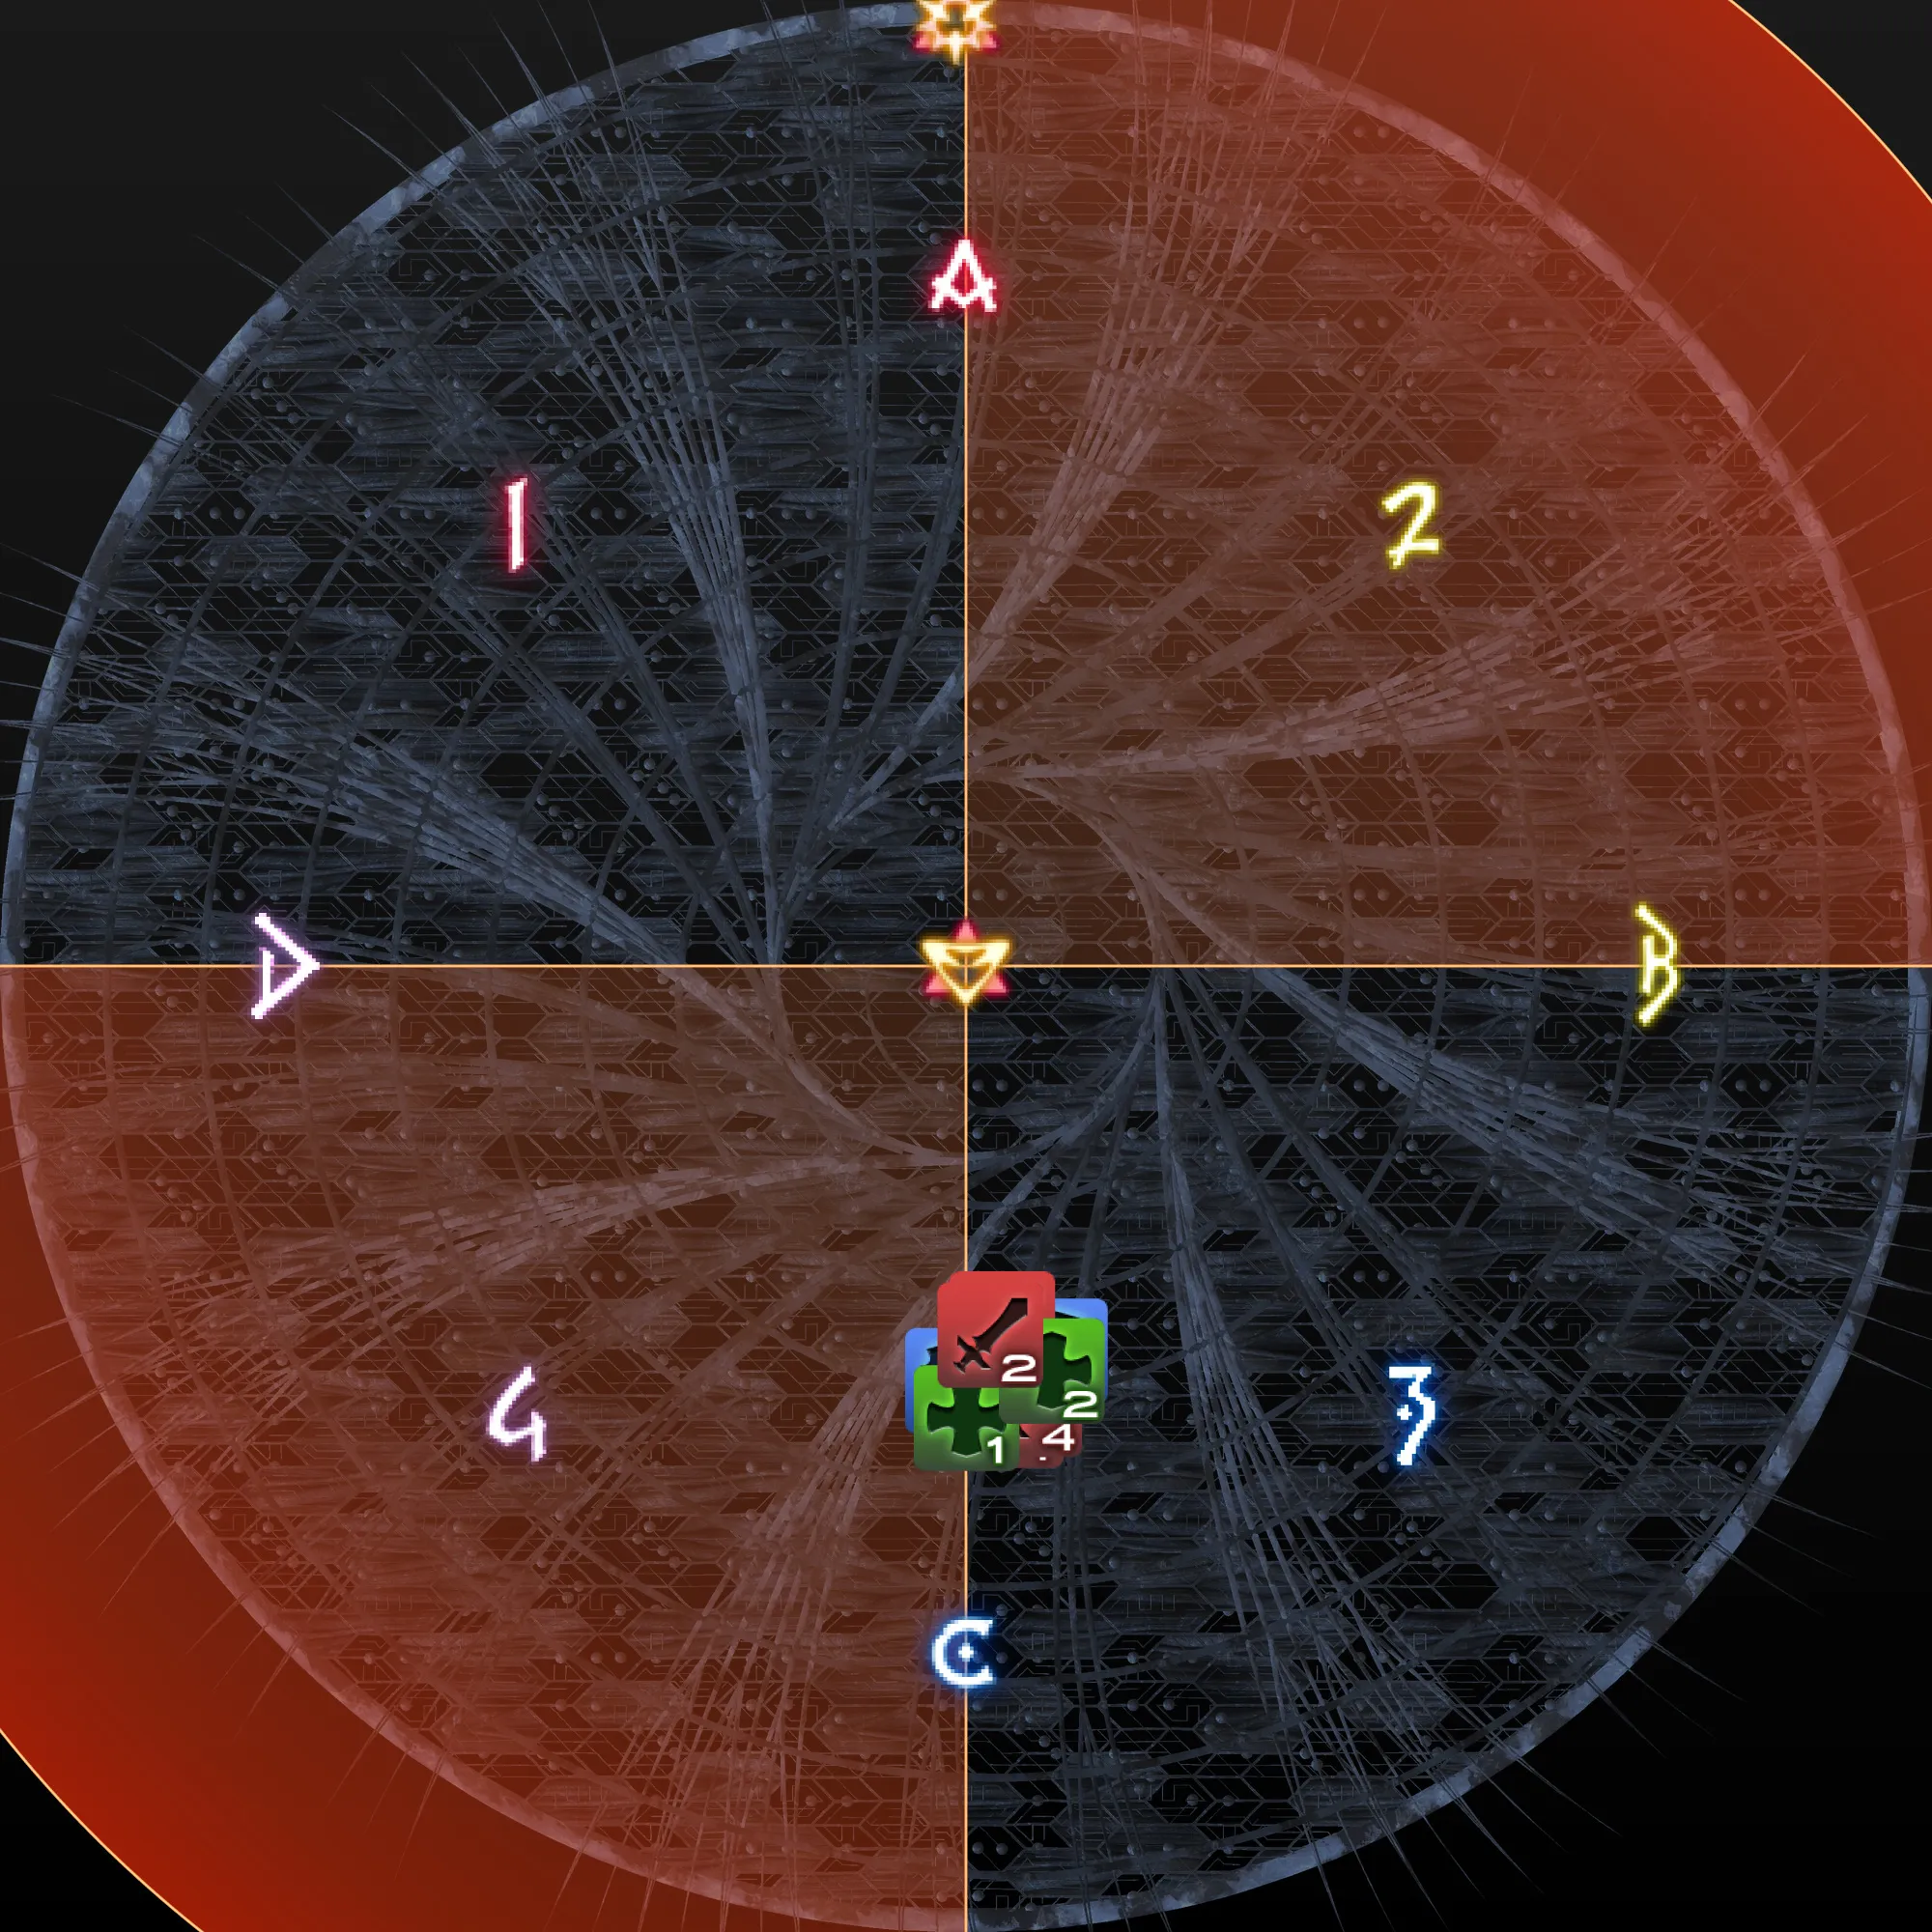
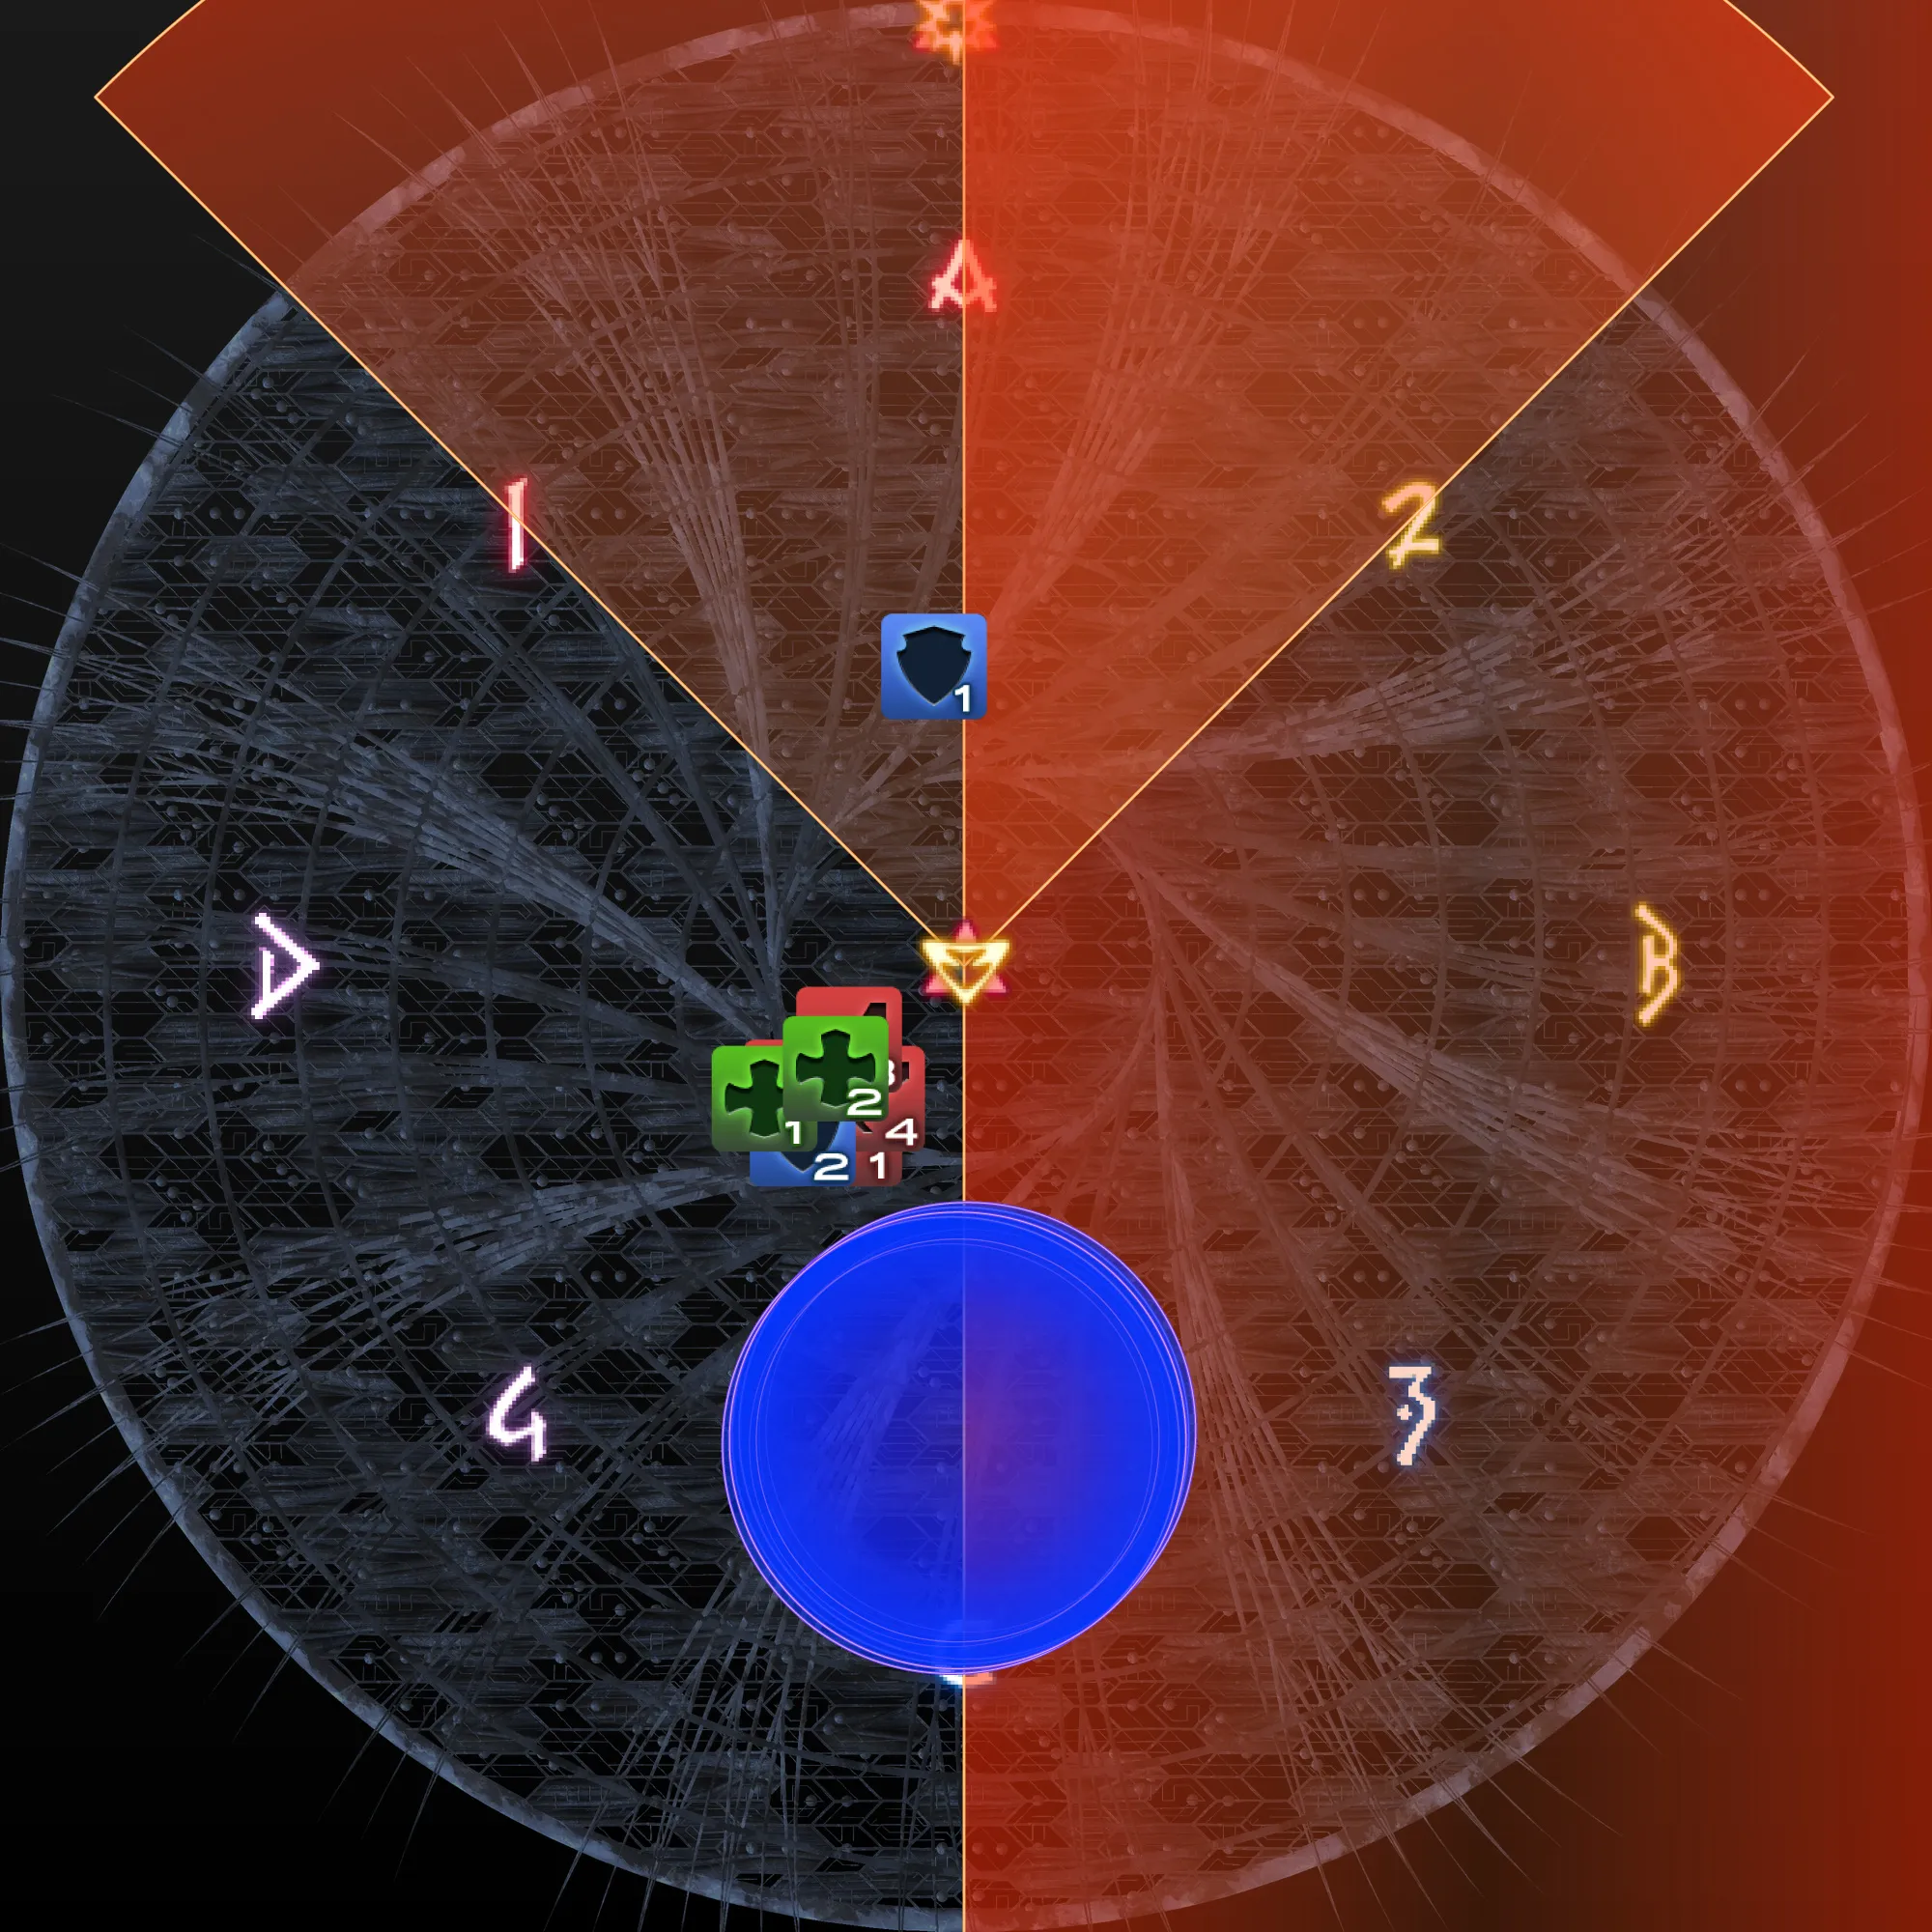
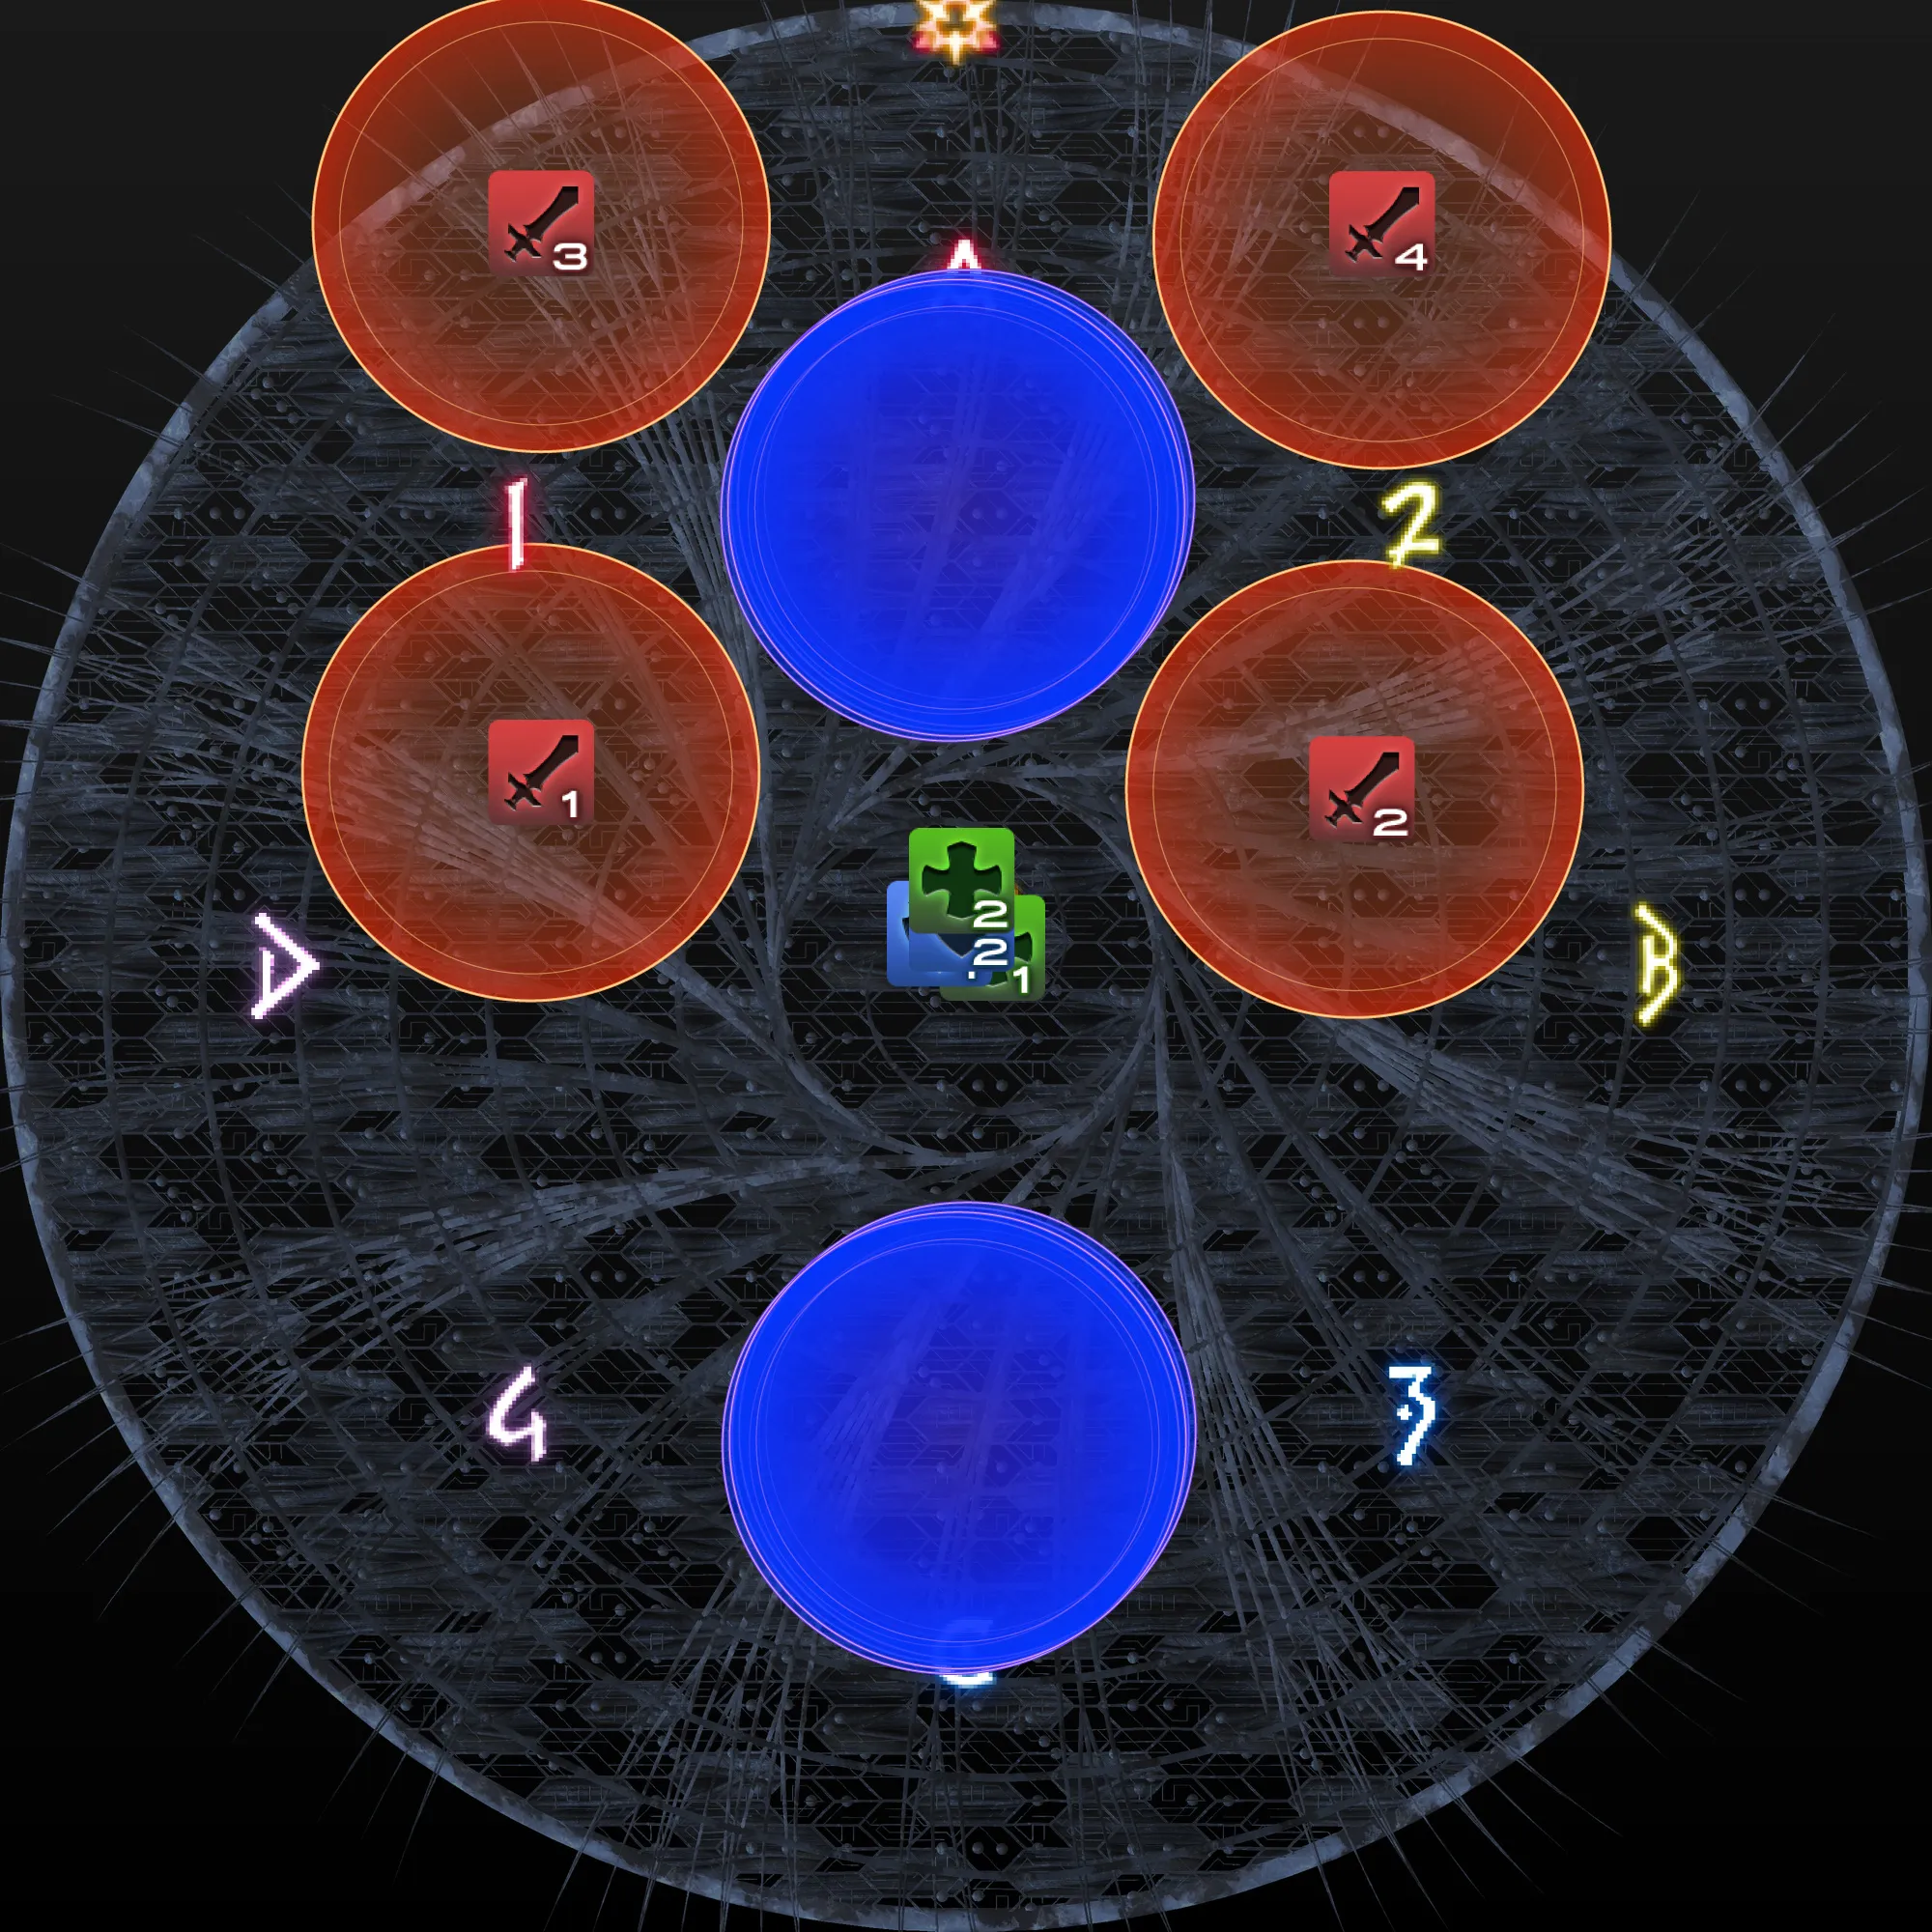
Source diagrams, in sequence (read left-to-right, top-to-bottom):
1.  | 2. 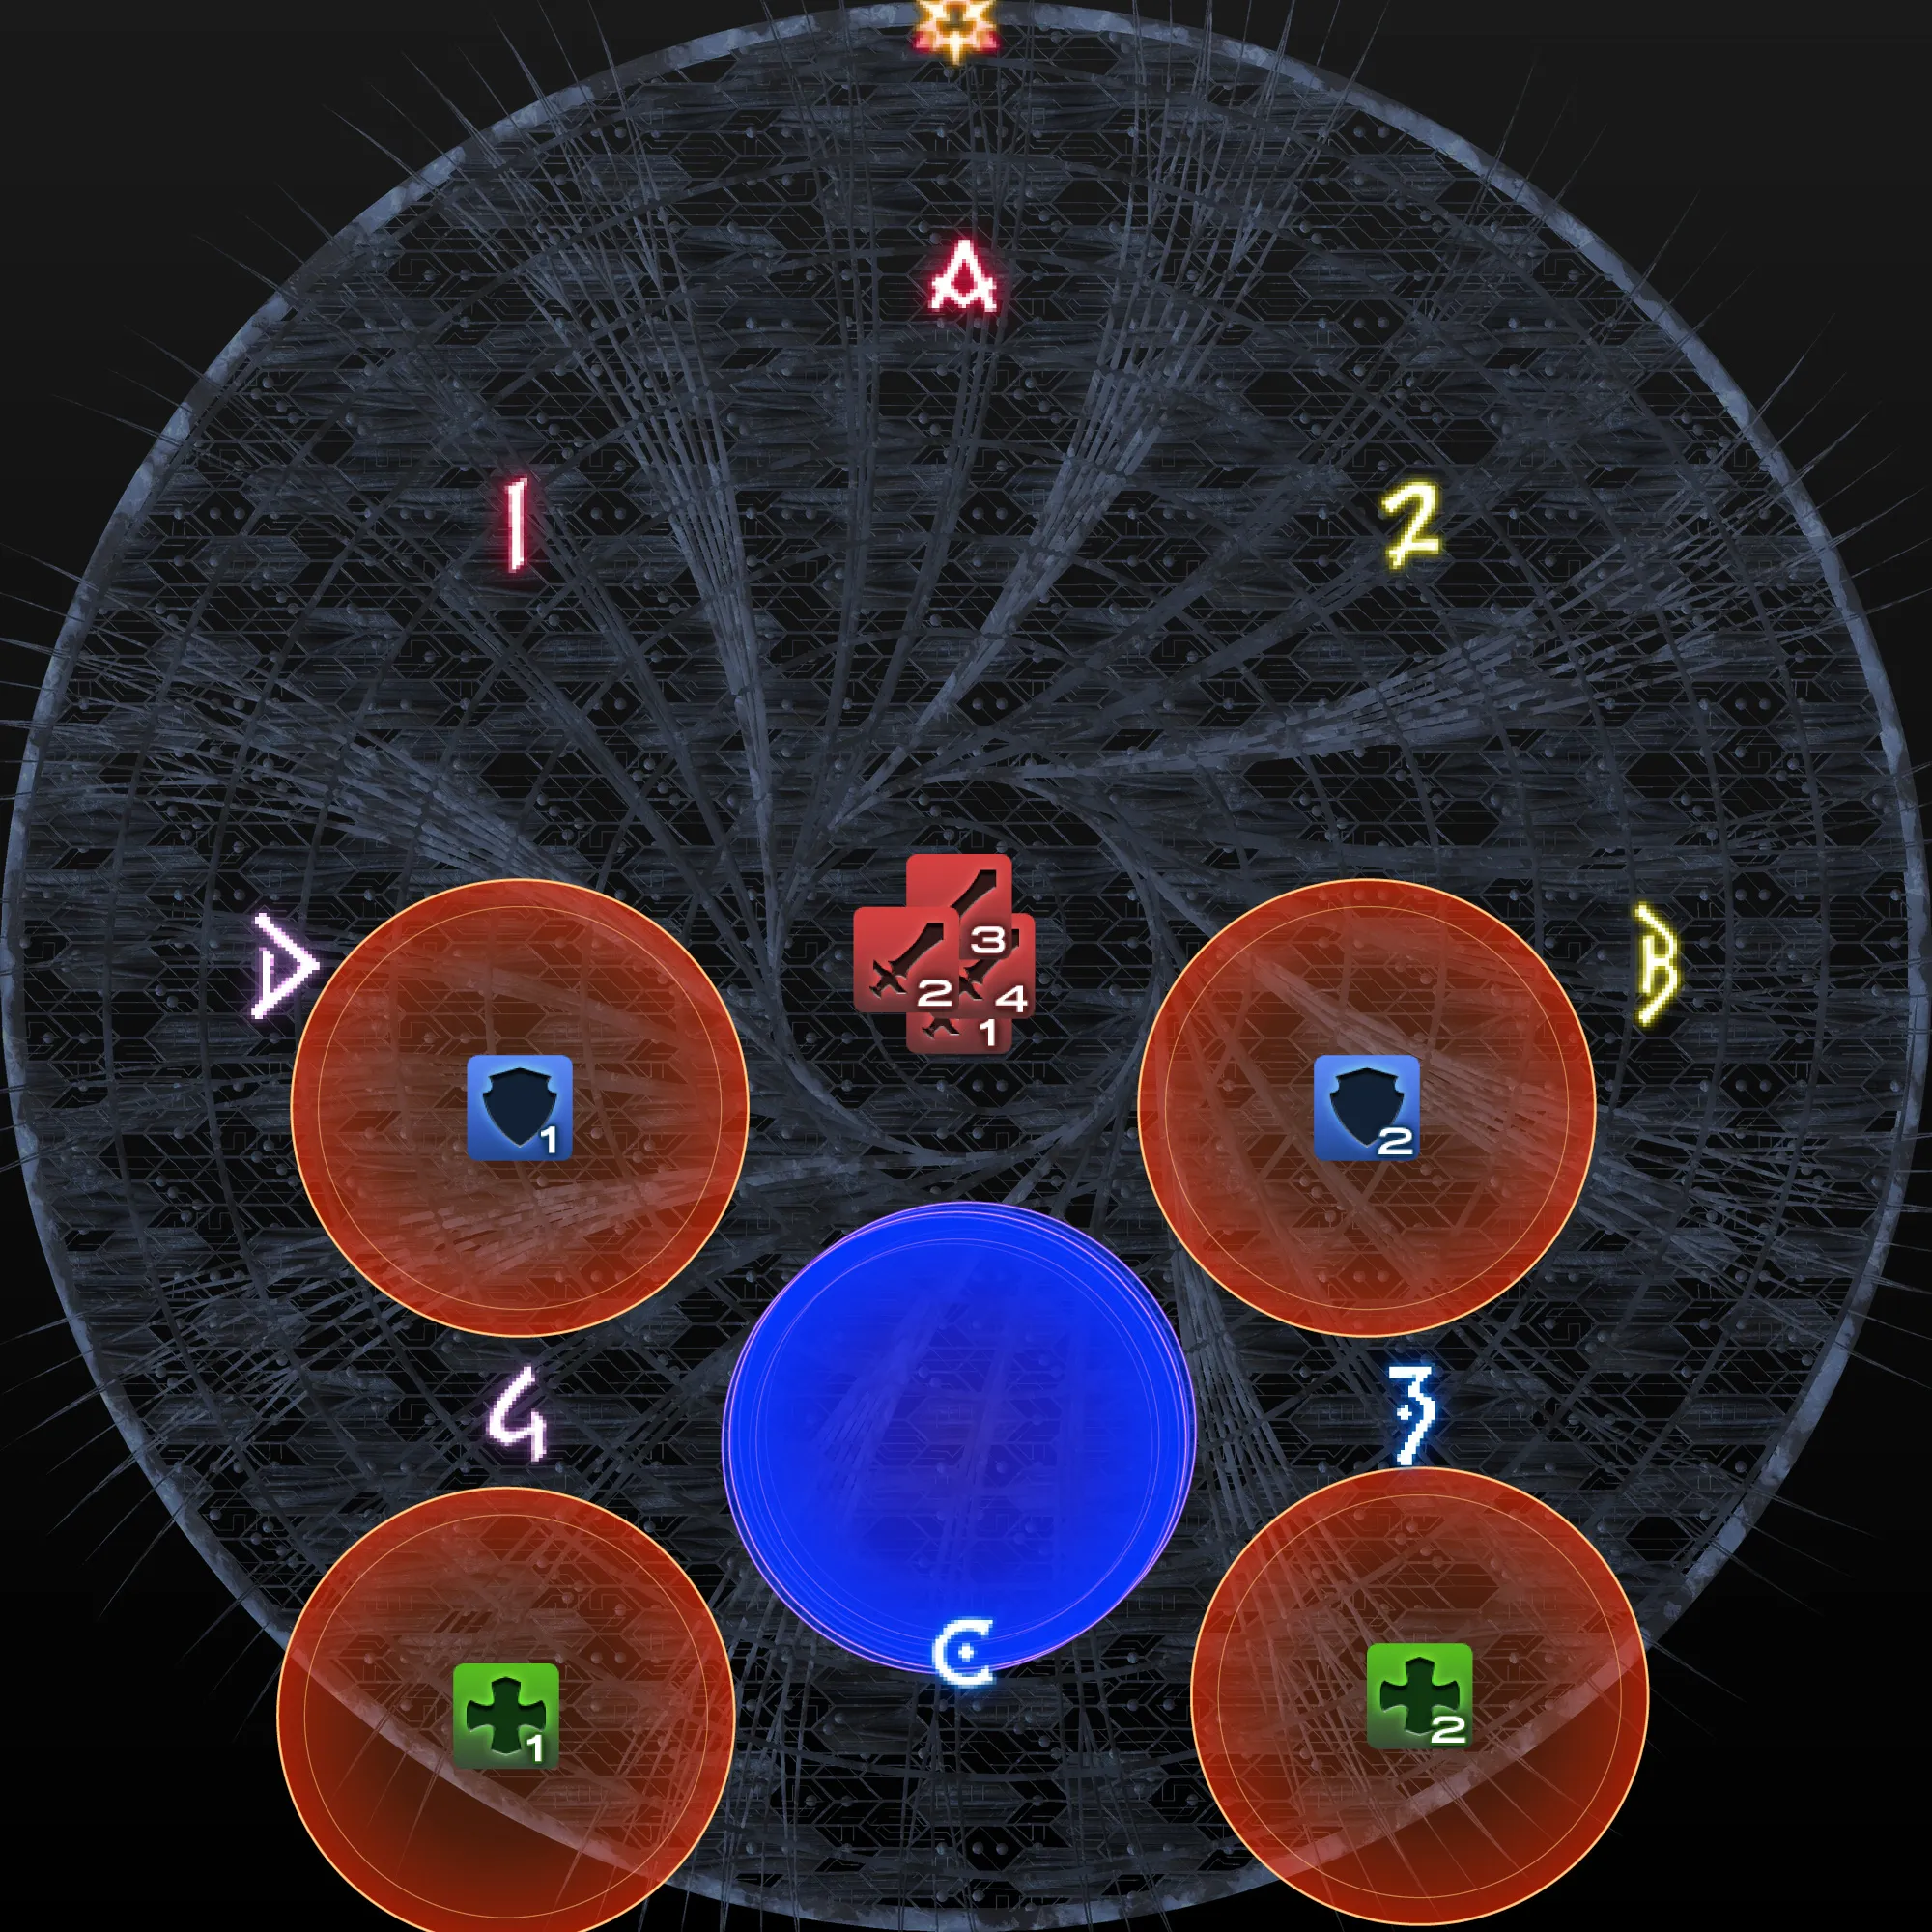 |
3.  | 4. 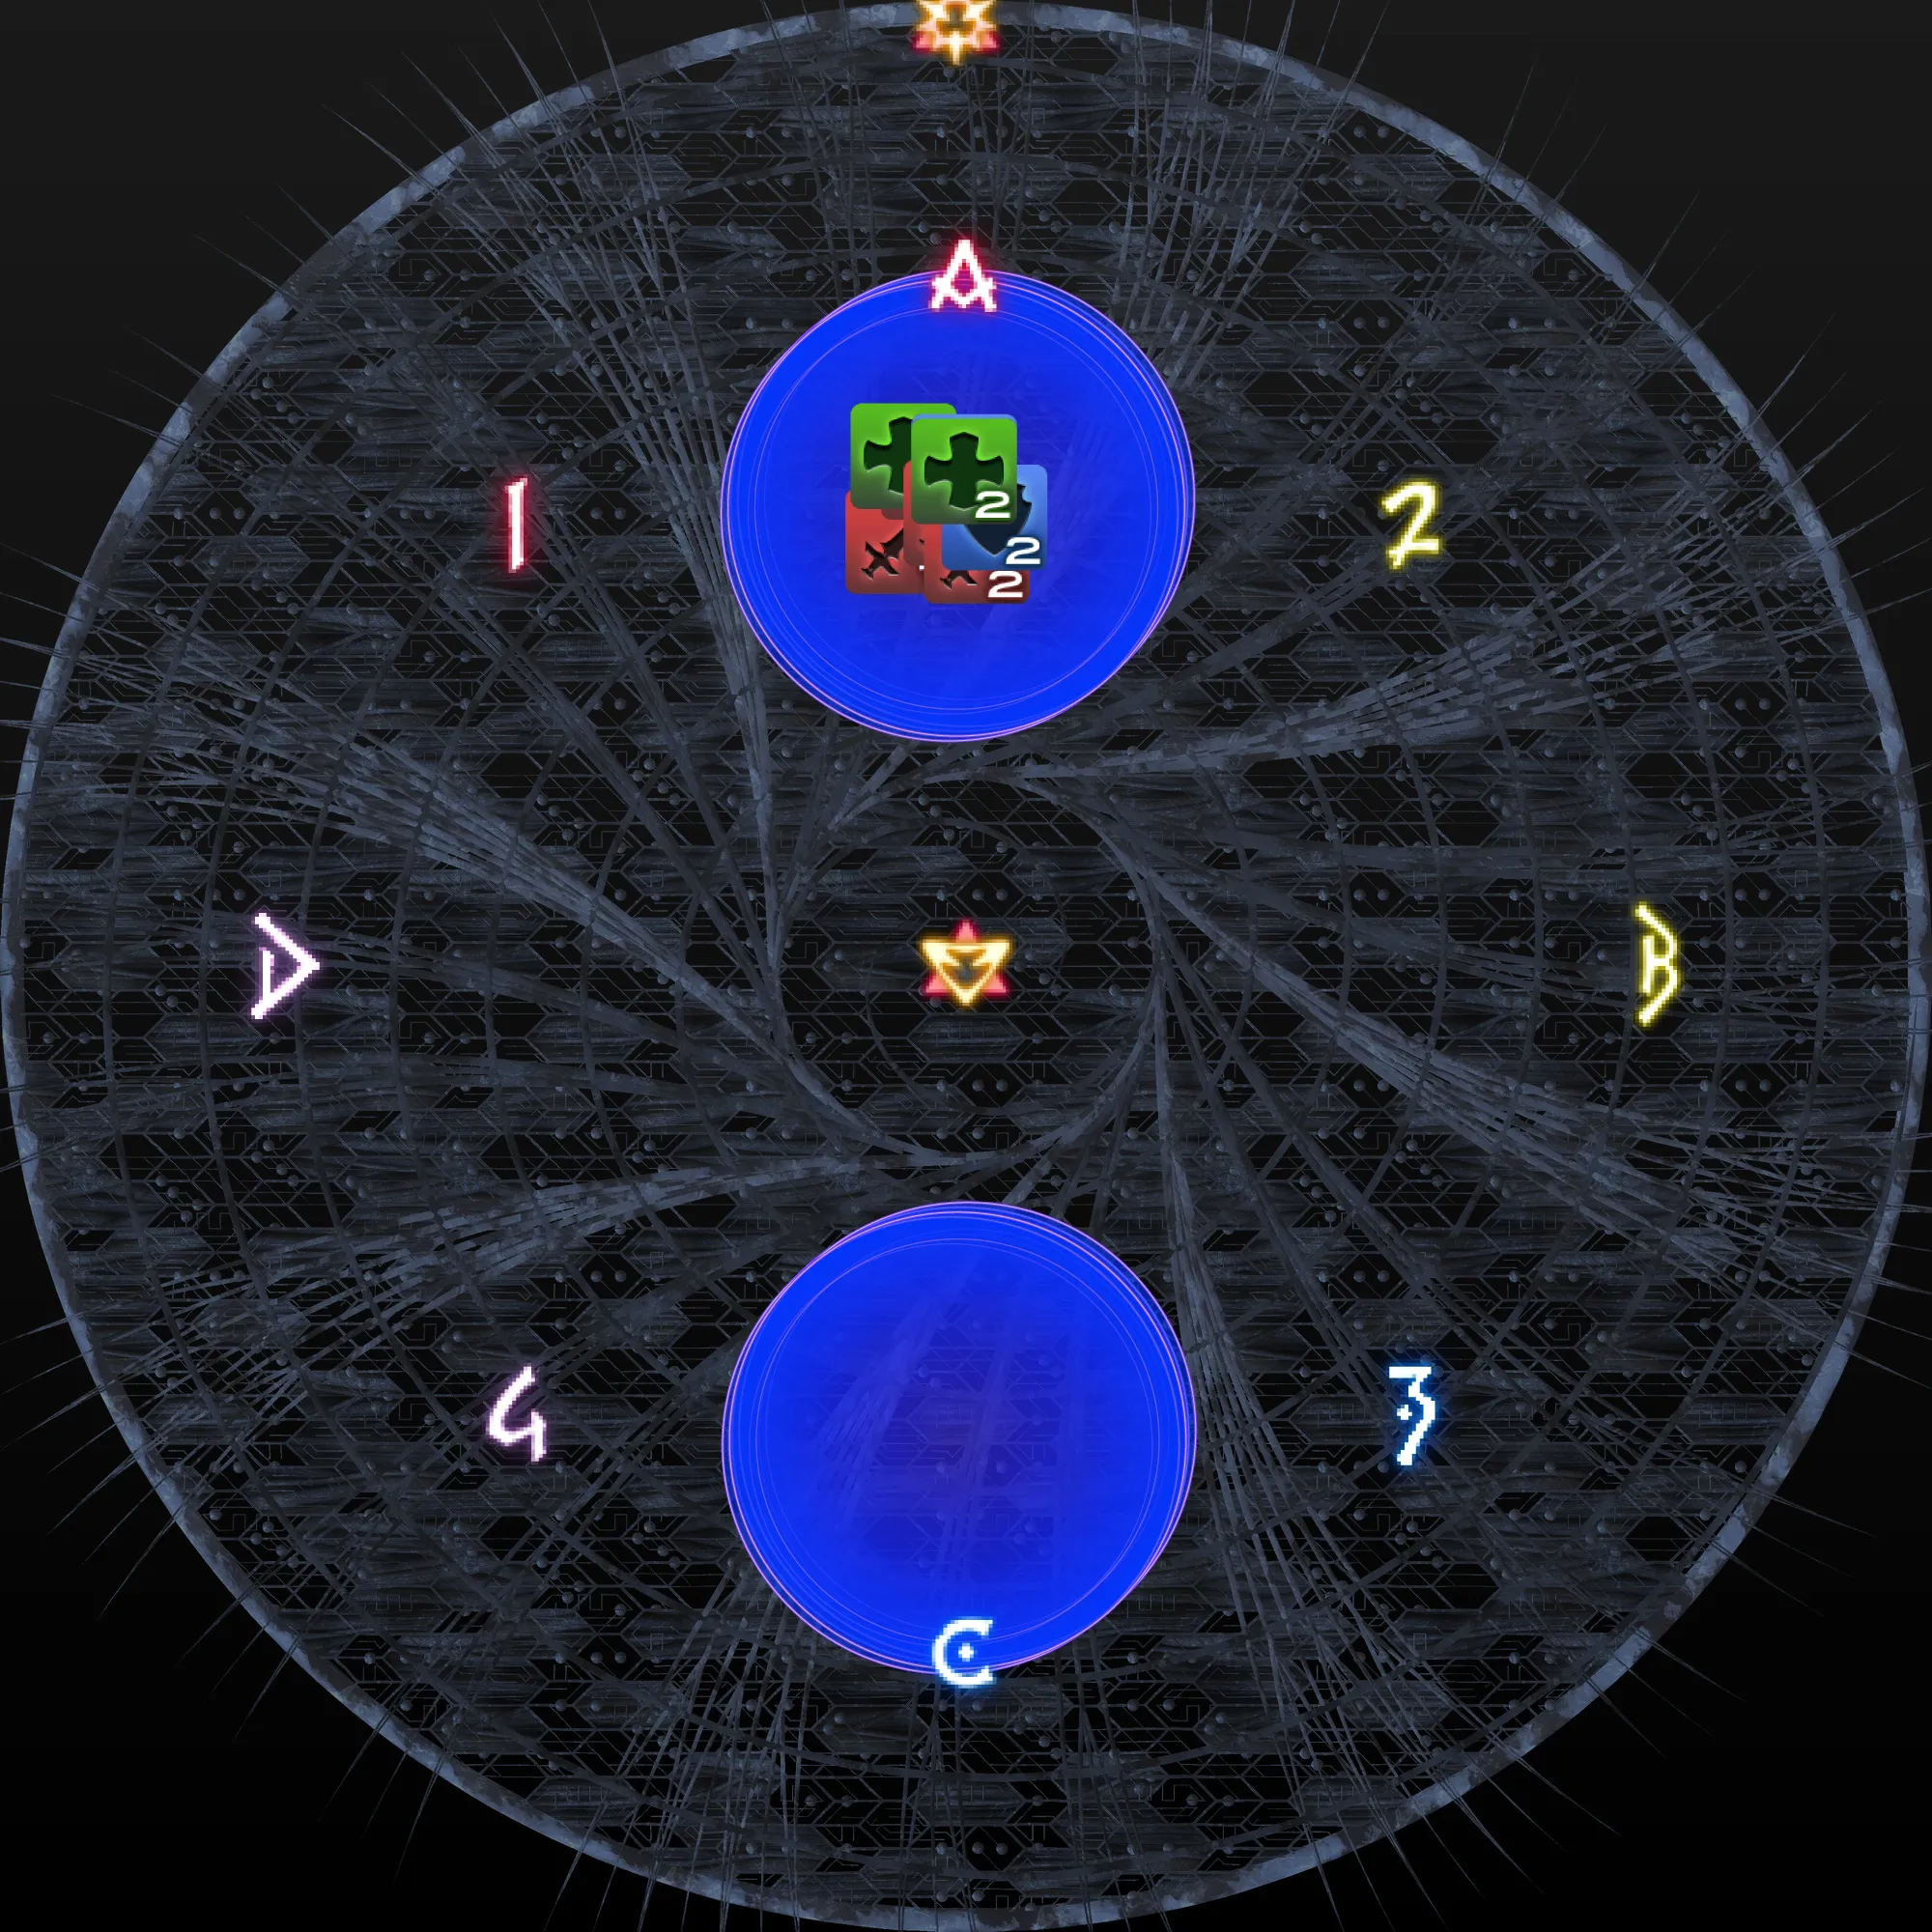 |
5.  | 6. 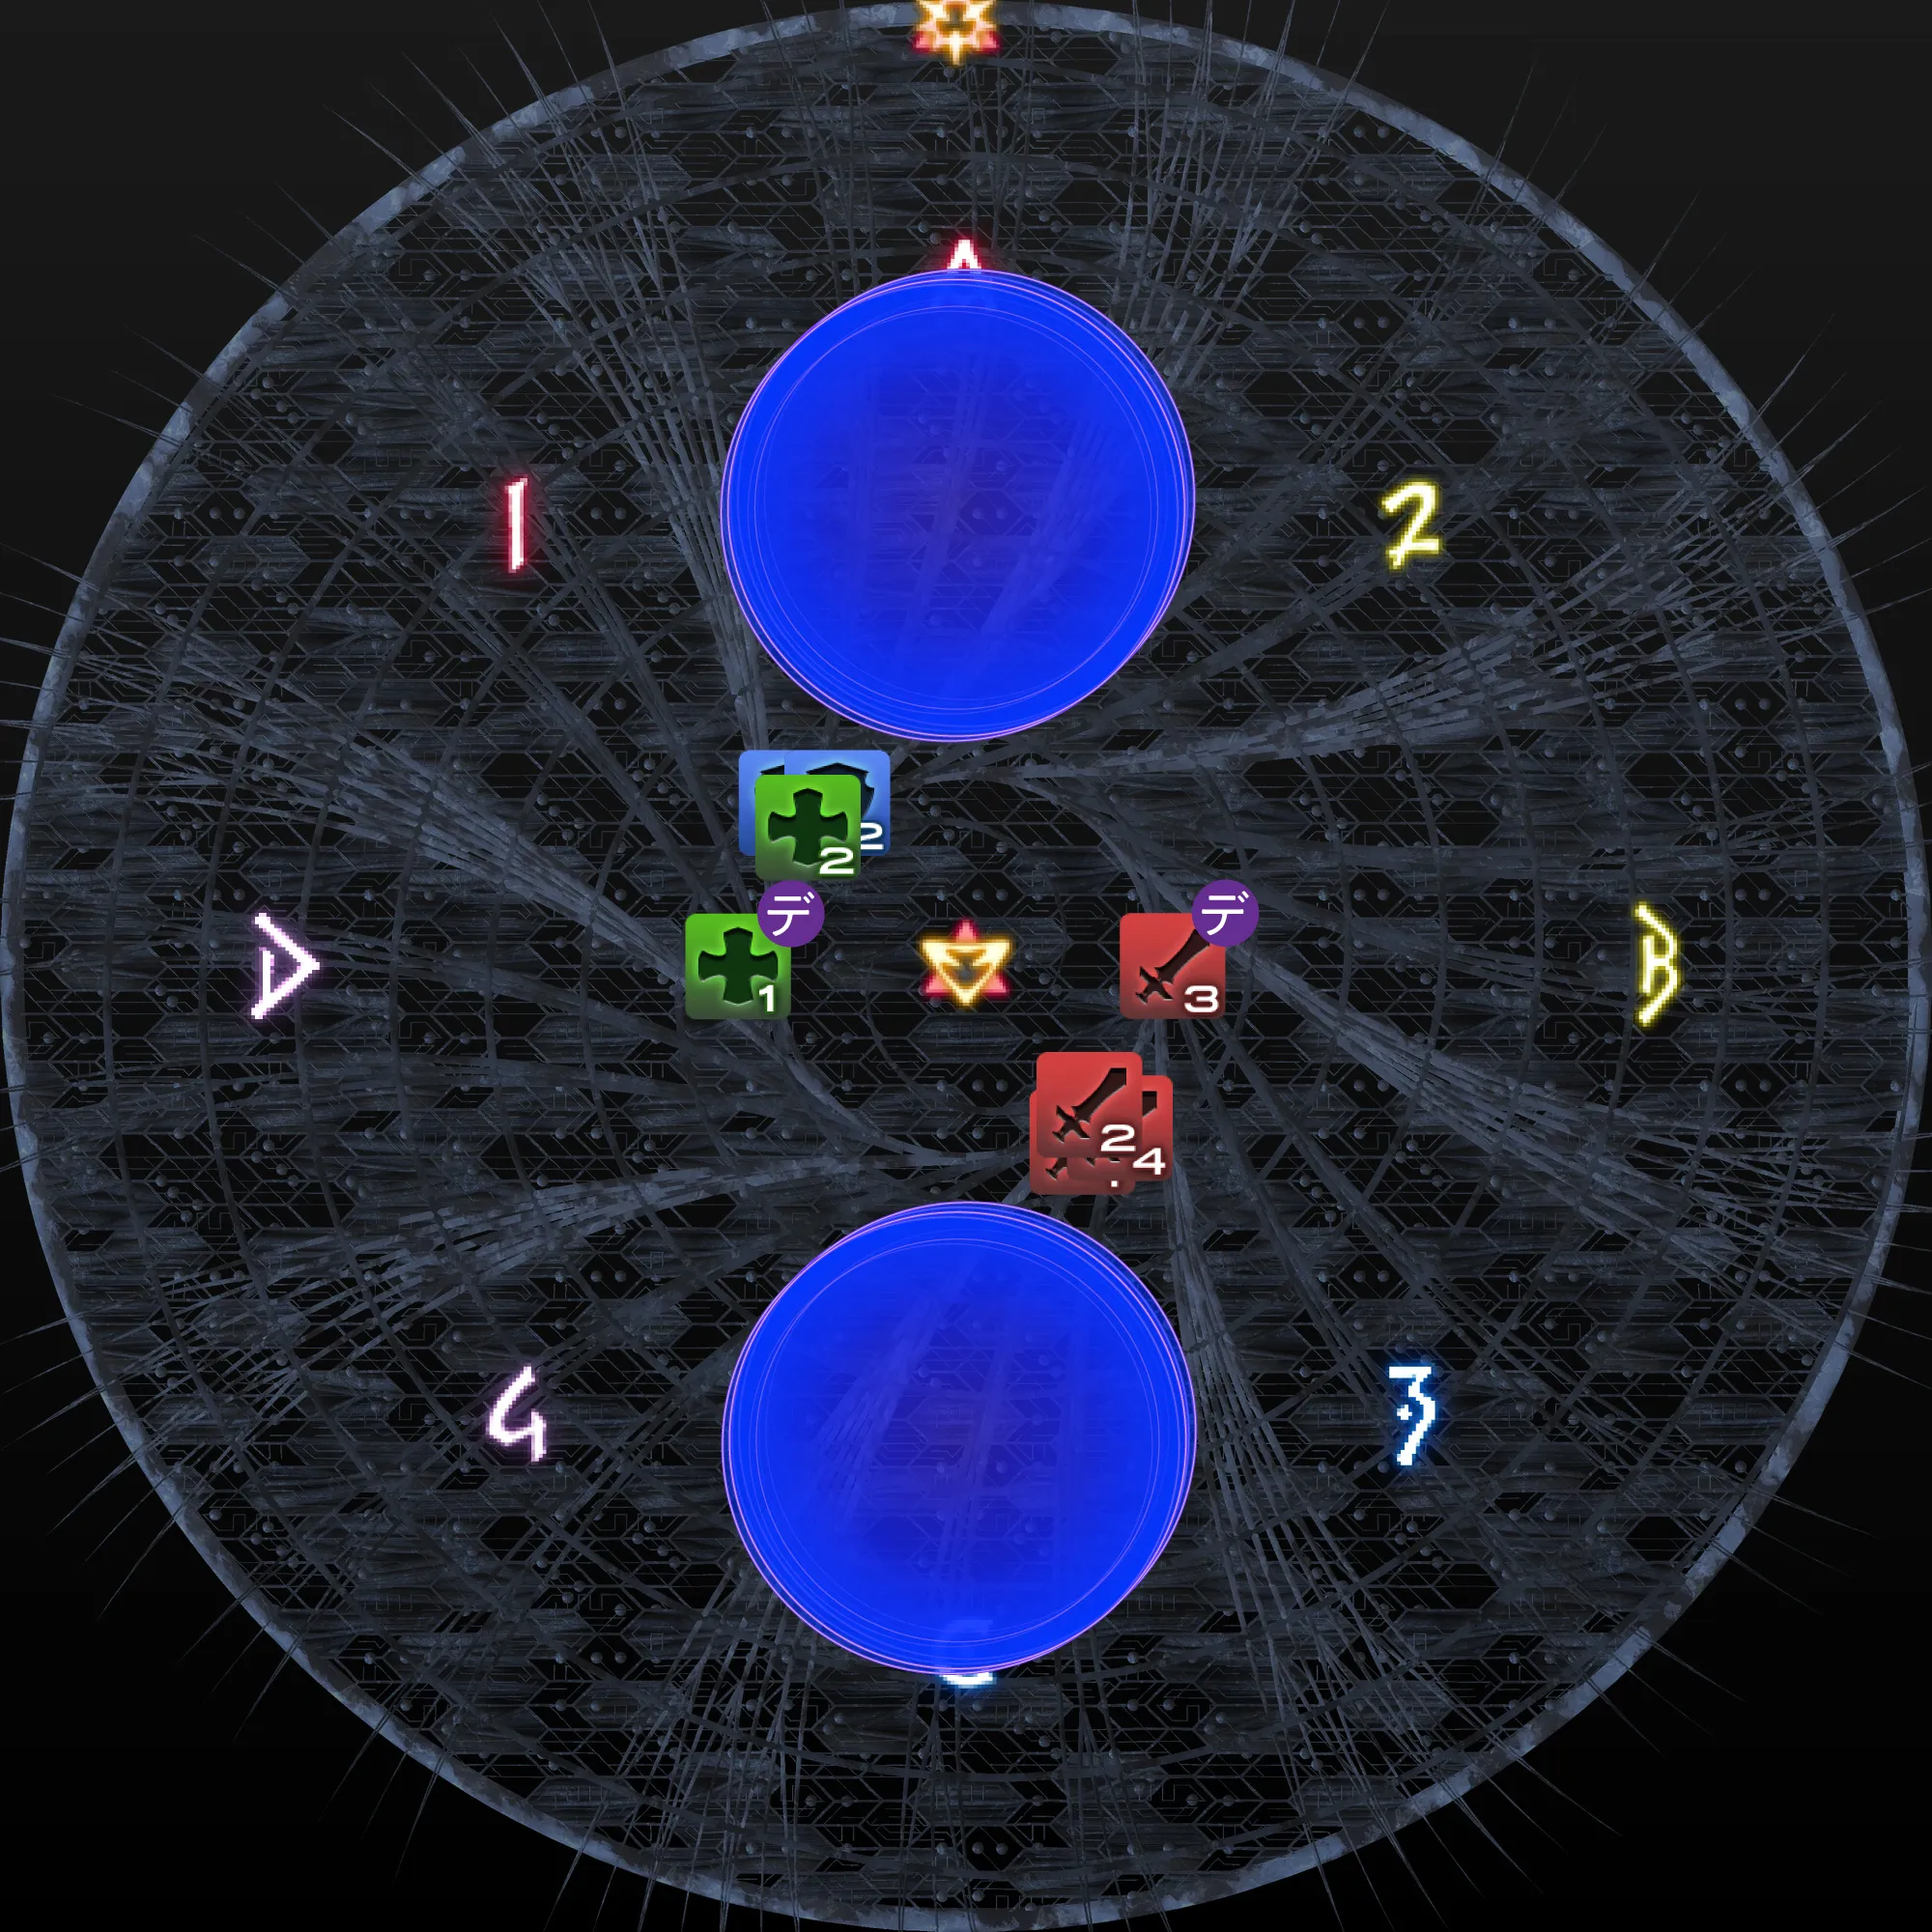 |
7. 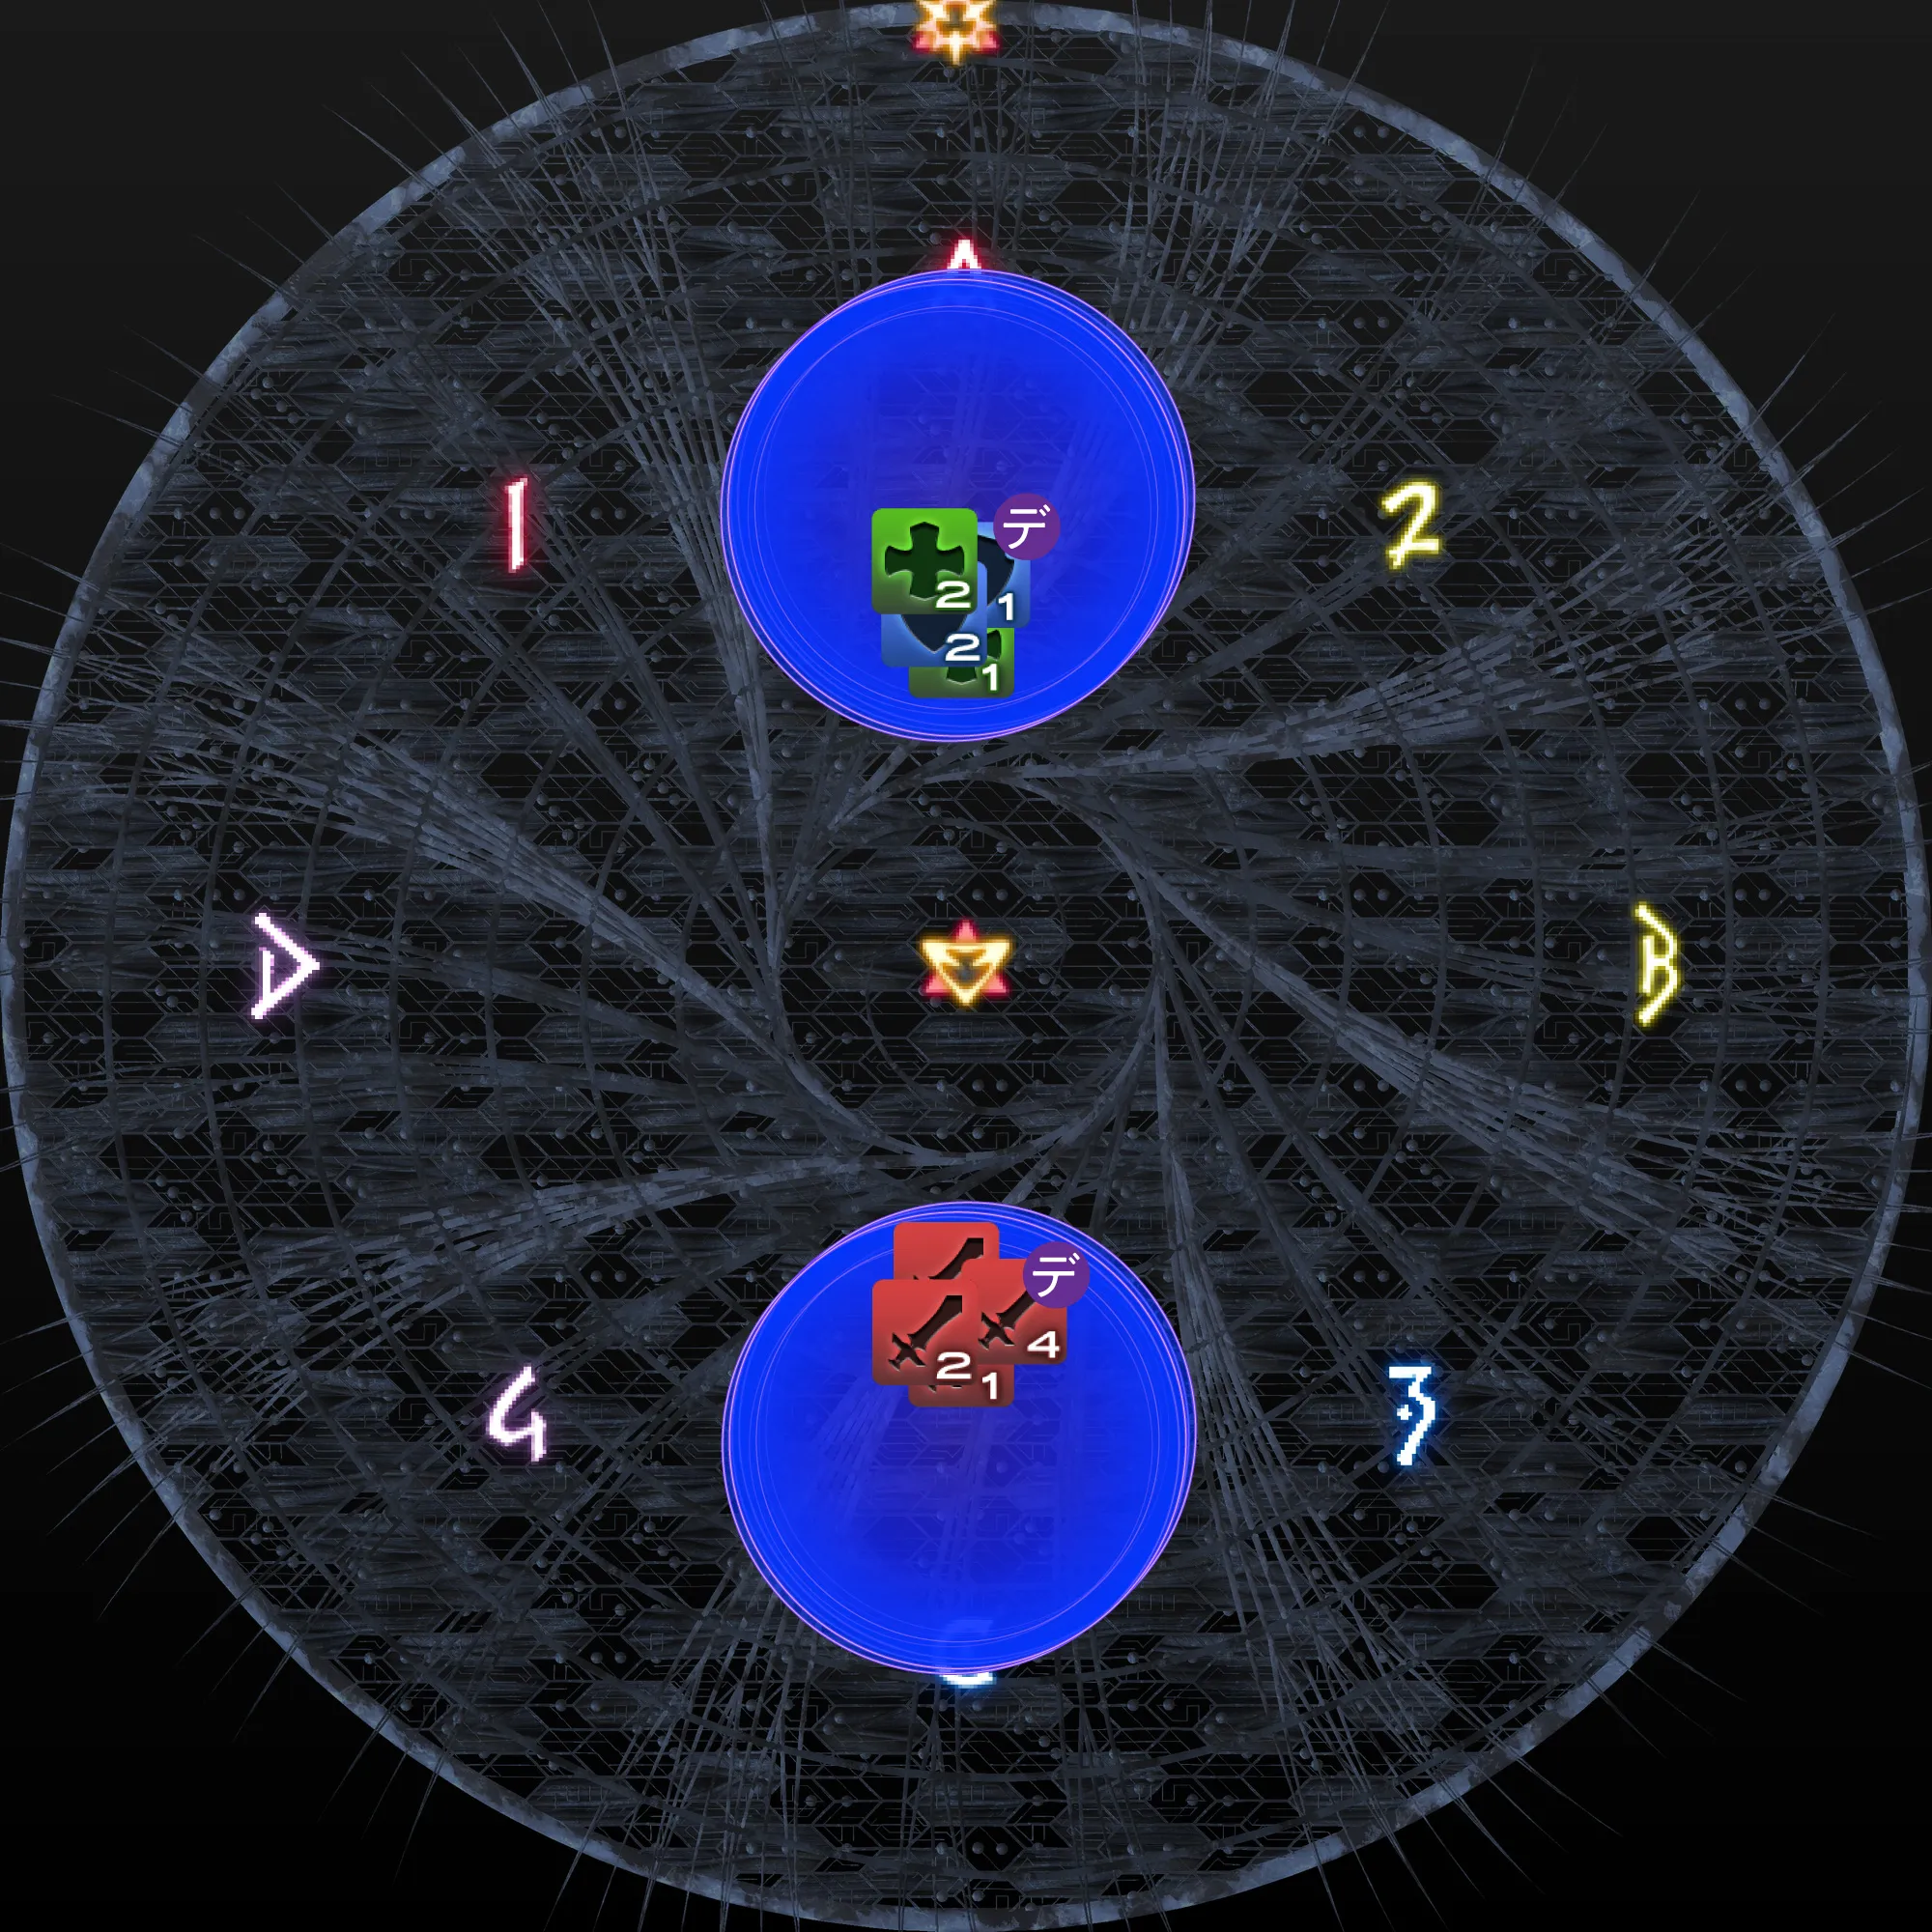 |
A second statue gives every player a line, split by role (tank/healer one direction, DPS the other) — check which line you hold. One gravity bomb headmark is then resolved as a stack in the South (頭割り):
- Gravity-bomb holder(s) → move South and stack to share the hit.
- Everyone else → move to the center / middle.
Your line orientation decides where you scatter once gravity resolves — the guide shows two patterns (e.g. a lower-right line vs. an upper-left line break to different spots). The statue also fires a half-arena cleave during this window — read the safe half and dodge into it.
Confetti Pass #2#
A second role-split debuff pass, resolved the same way as the first: Supports West, DPS East, share the knockback and stack.
Ruin III — Half-Arena#
Half-room AoE cleave. Dodge to the safe half; tank swap if it is paired with a buster.
Graven Image 3 — Tele-Portent (Sleep / Confusion Arrows)#
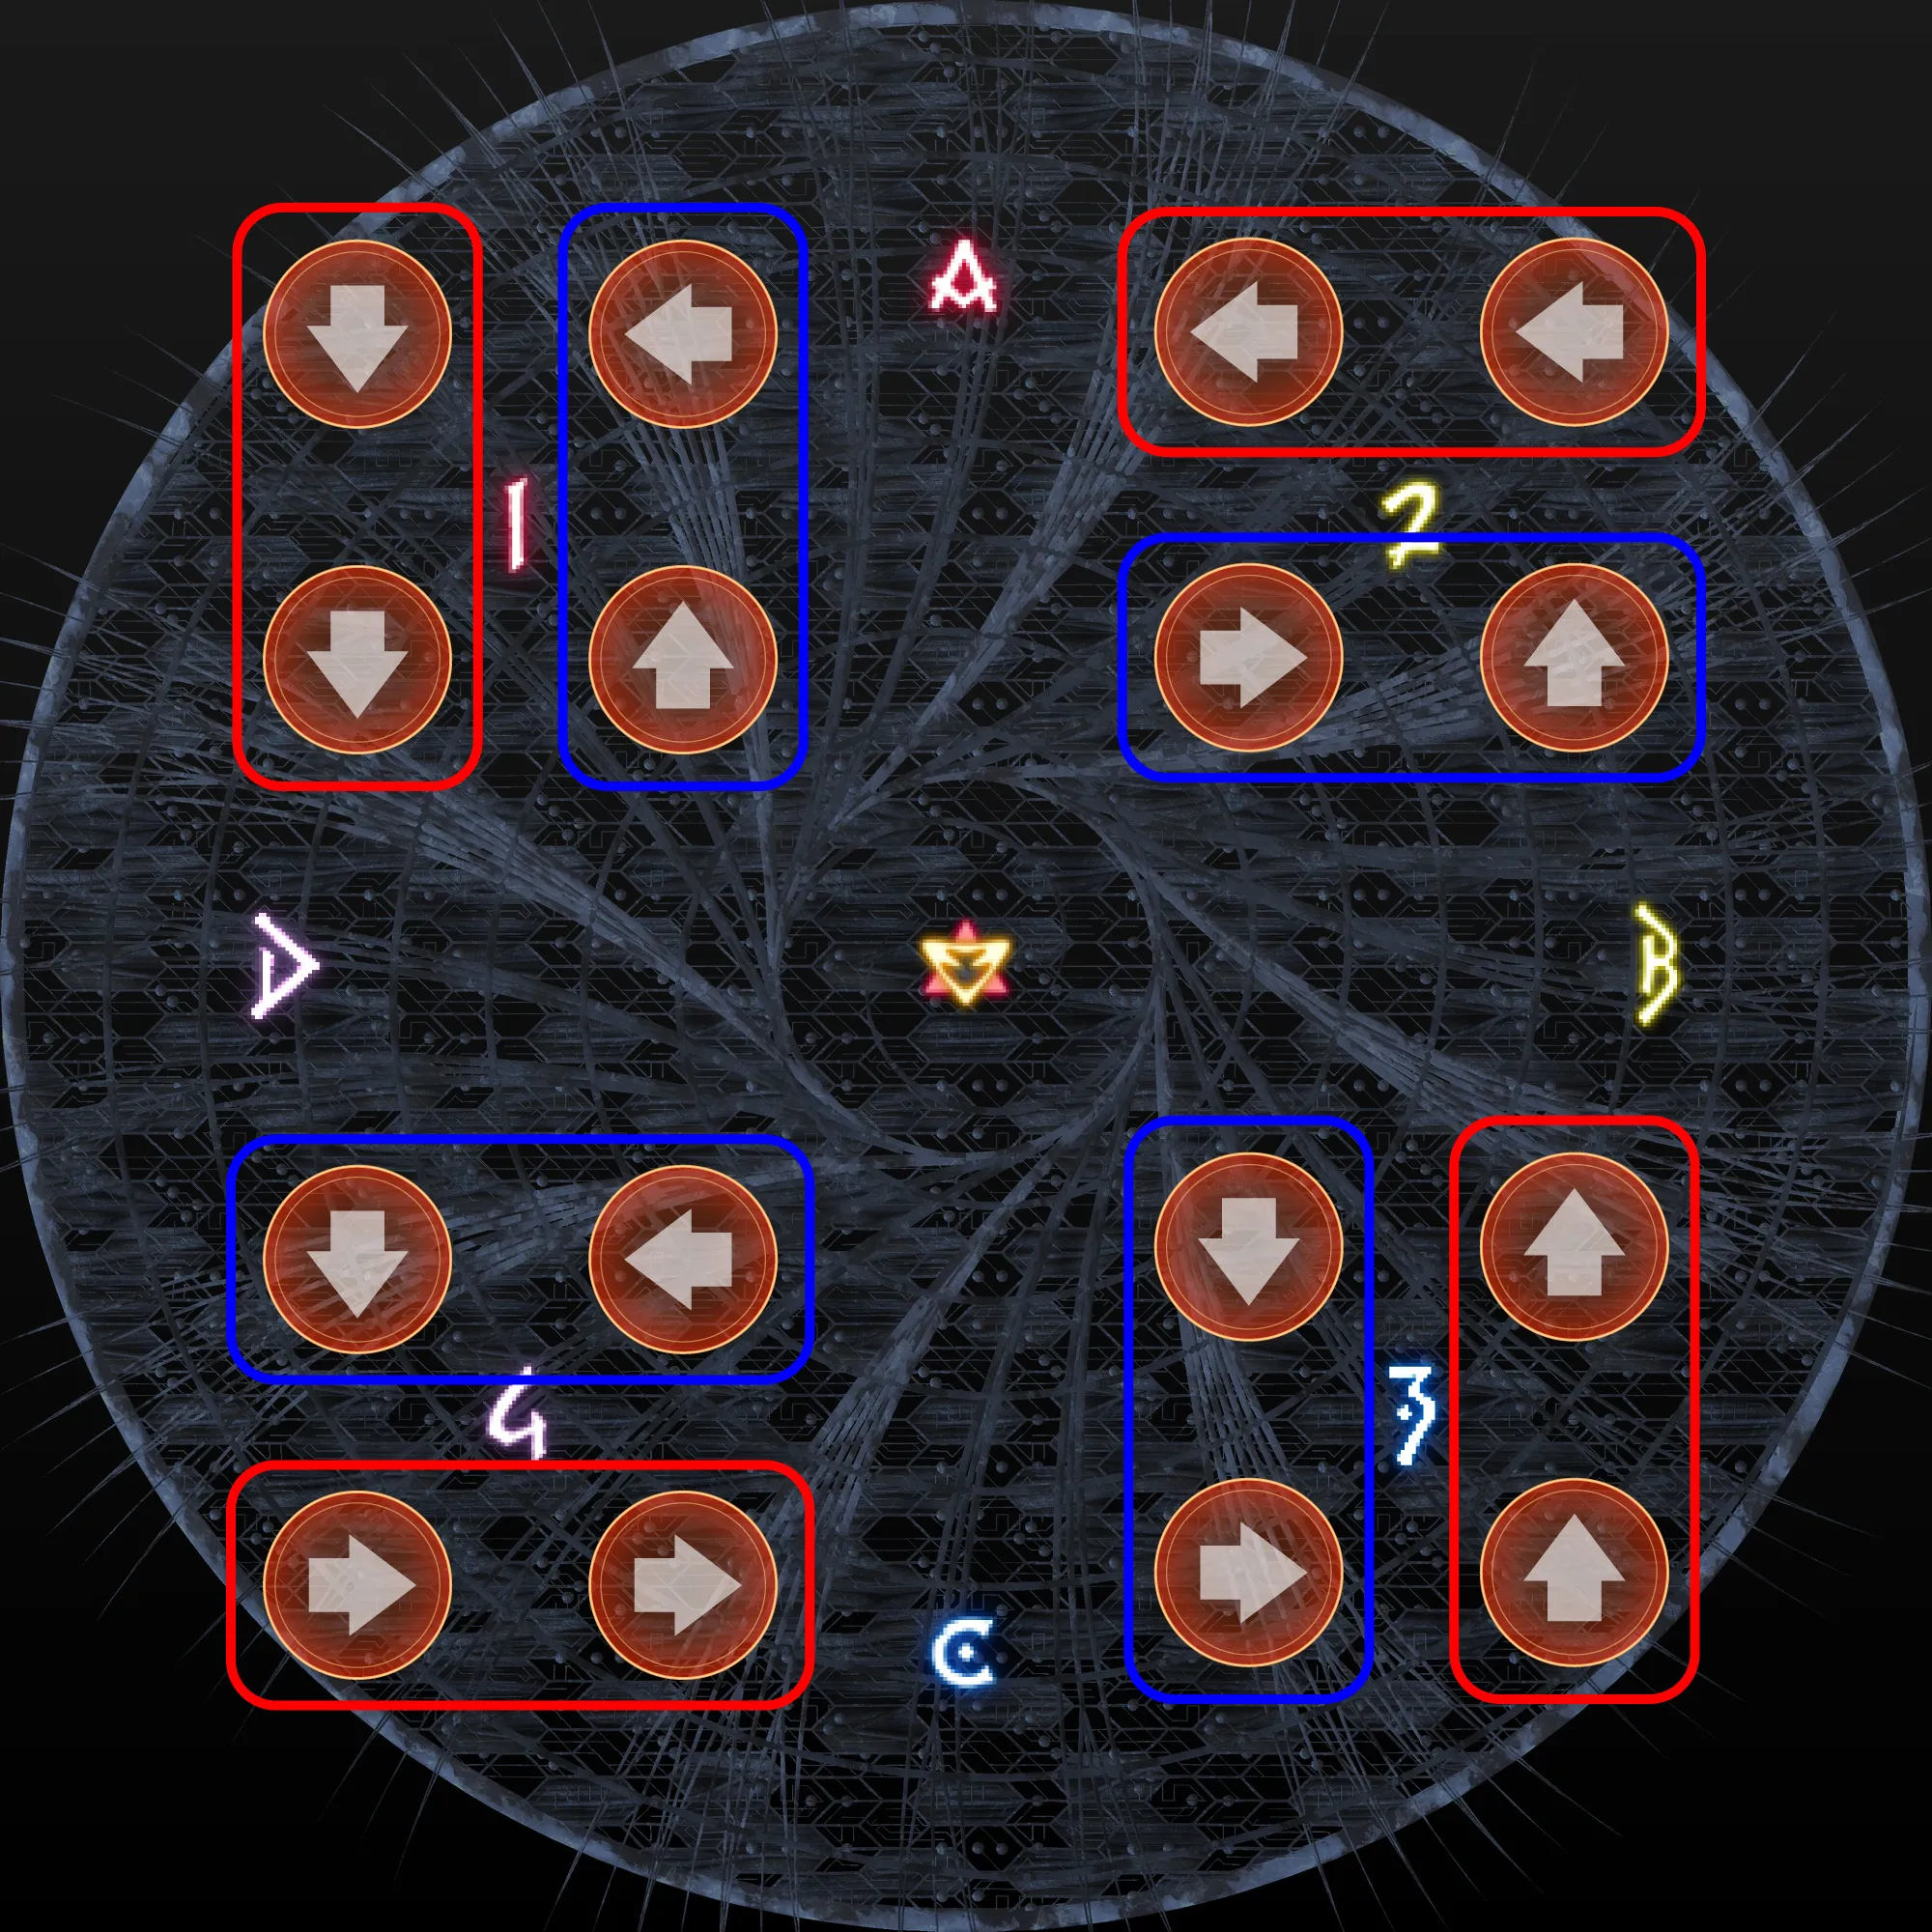
Each player receives two arrow debuffs that place a teleporter on expiry, plus a Sleep or Confusion debuff. The party is split into tank/healer one debuff, DPS the other (the source shows both pairings: TH Sleep / DPS Confusion and TH Confusion / DPS Sleep).
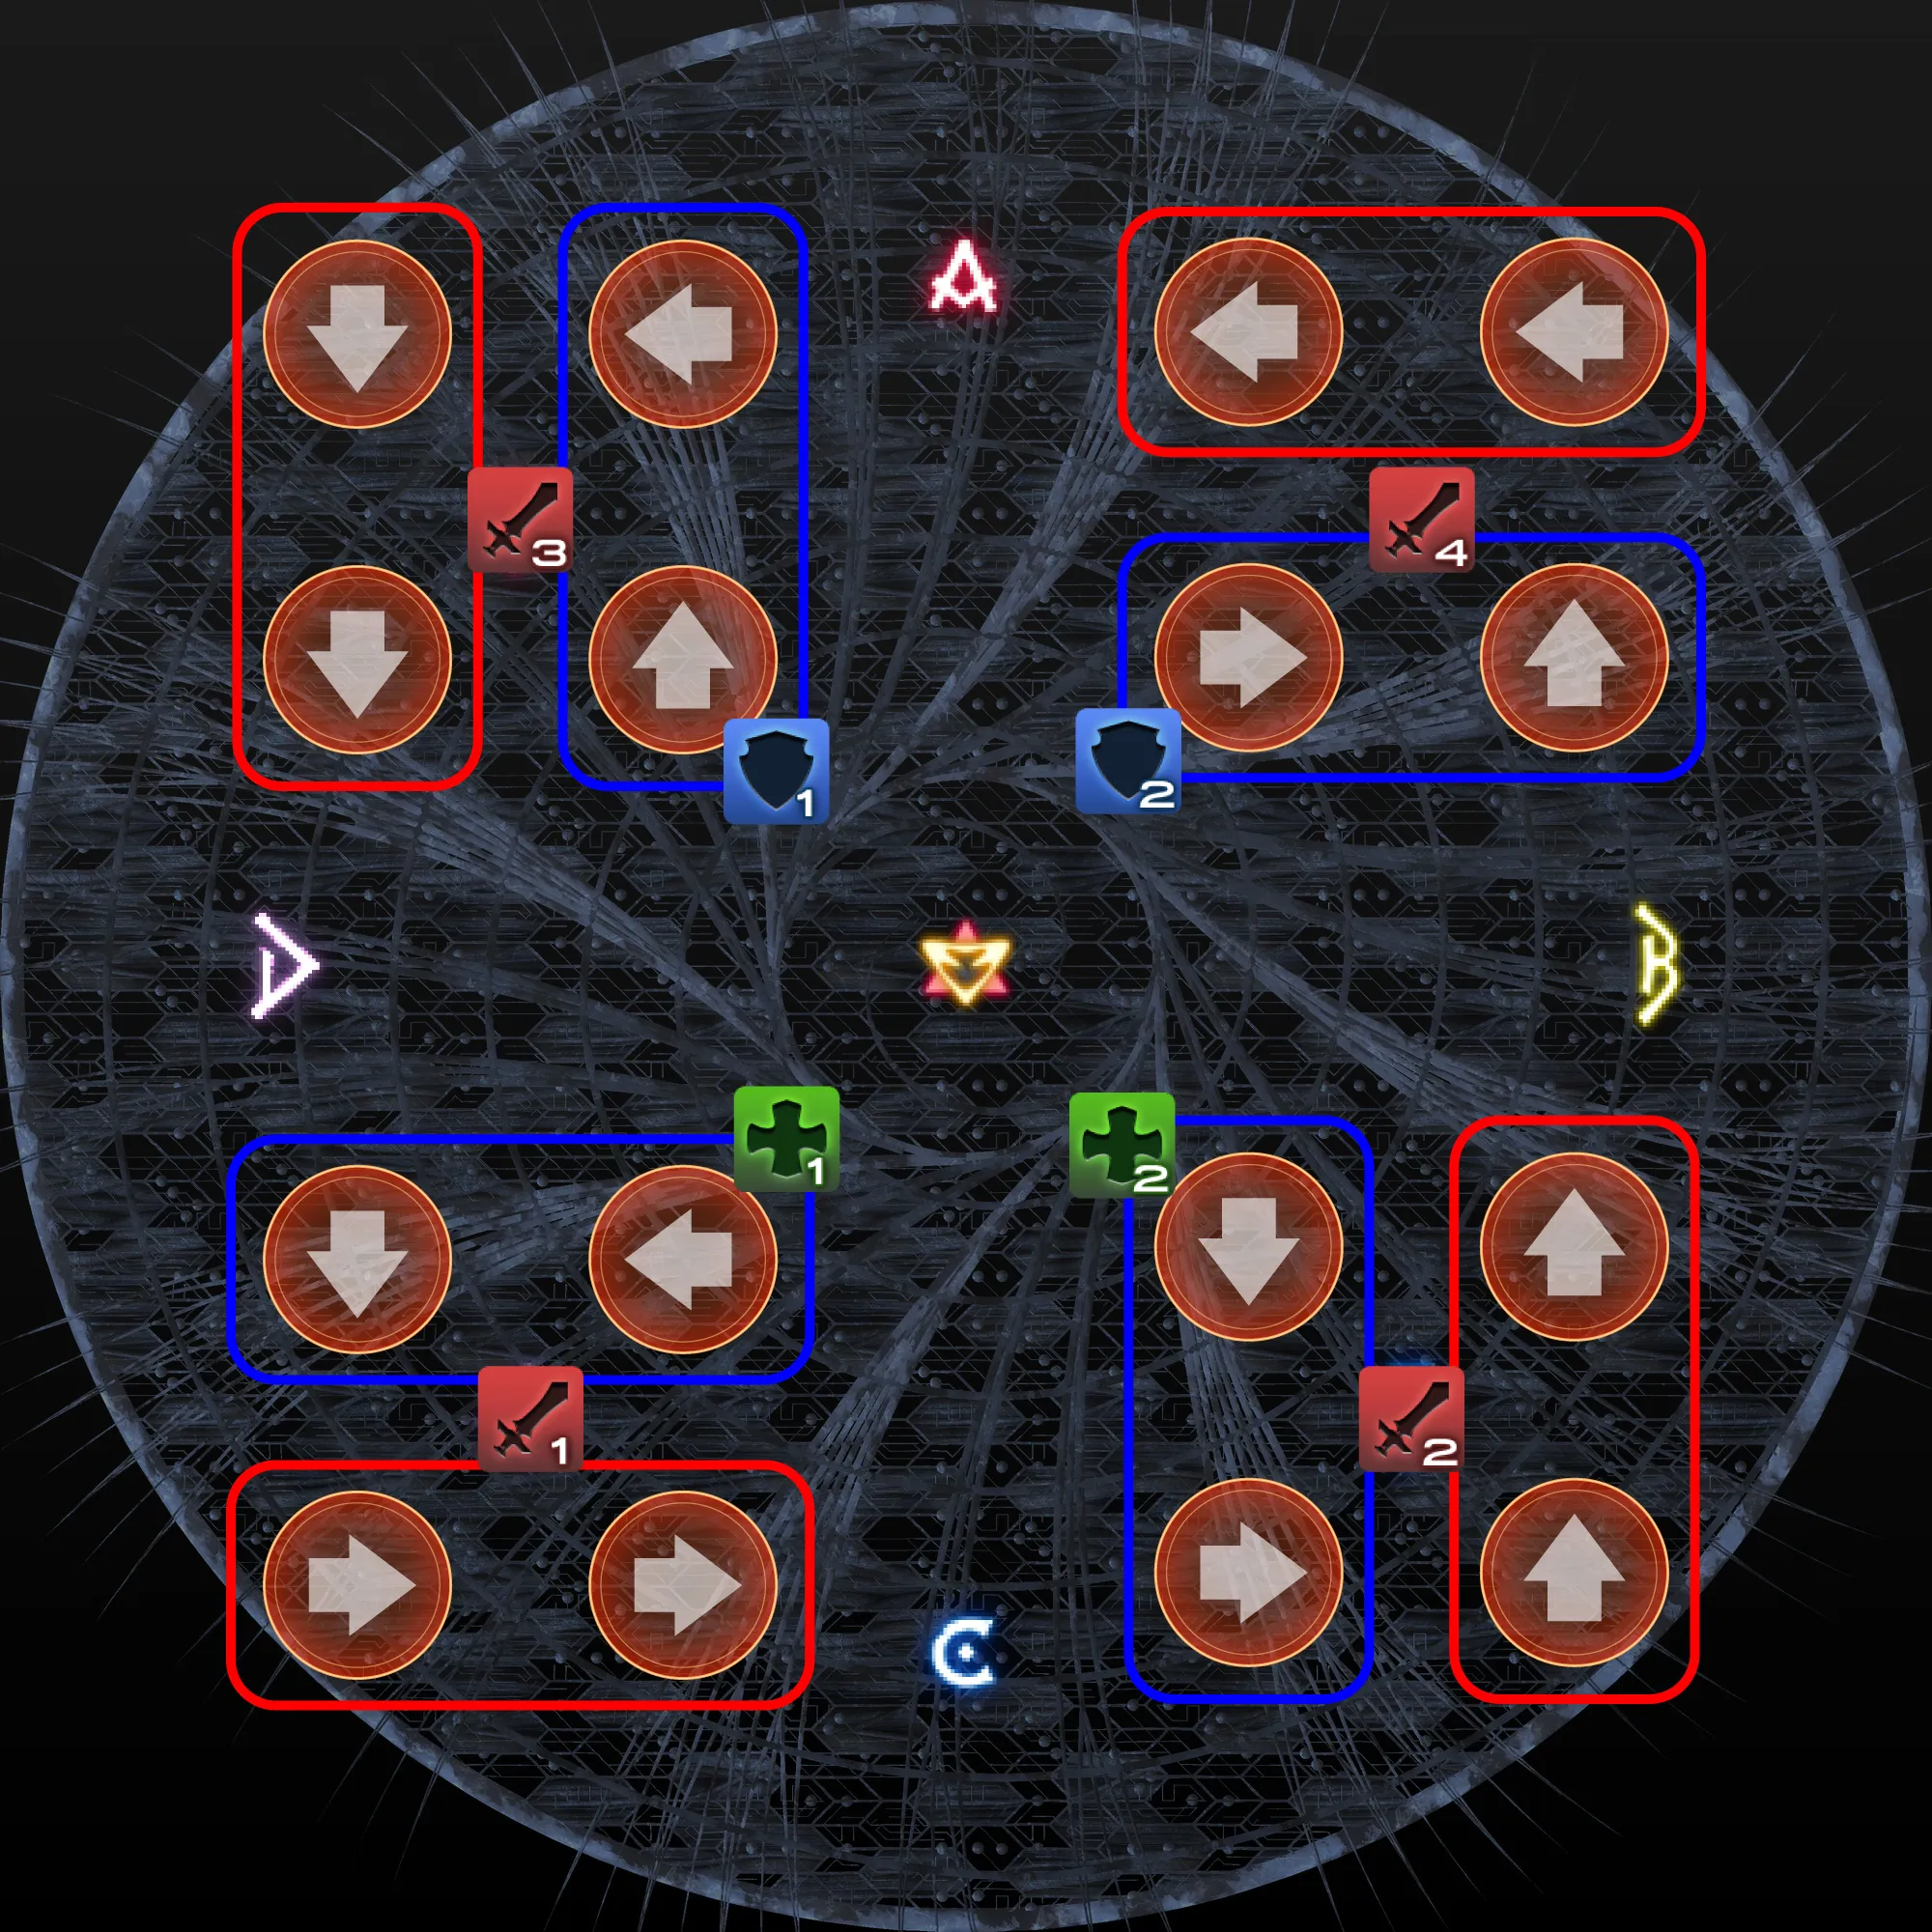
Positioning by arrow match:
| Arrows | Position |
|---|---|
| Matching arrows | Inner ("red box") |
| Different arrows | Outer ("blue box") |
The source's key tip: place yourself on the corners of the field-marker squares (フィールドマーカーの四角の角っちょ) for consistency — this is the most common failure point.
Clearing this resolves the phase; Phase 2 begins at ~14.9% boss HP.
DPS Note#
PF convention runs a 0-second burst opener to maximize uptime against the phase's damage check.
Differs from our strat? See the Bubble Mew P1 strat for comparison.